Showing posts with label Lawn Fawn. Show all posts

Monday, June 10, 2019

No Line Coloring with Watercolor/Gouache Greeting Card


Recently I posted a no line coloring card using only colored pencils (here's another example as well). This time I used gouache to block in the colors and then went over the image with Polychromos colored pencils to add gradients and details. Gouache reactivates when painted over so it's difficult to achieve smooth gradients, especially if the gouache is student grade. I first tried Arteza Gouache, before I planned to use colored pencils, but it was really not working for me so I switched to Holbein Gouache.* It was a little better but still moved the paint too much. If you are going to use colored pencils in the end as recommended, either gouache should work.

*A note about gouache: there are two types of gouache, one that reactivates with water and one that does not. The latter is called Acryl or Acryla gouache (depending on brand); these are more like acrylic paint. They are permanent once dry, thus you may layer these without affecting the previous (dried) layers.

Disclaimer: Please help support my work in this small way - just use my links if you plan to purchase anything - there's no extra cost to you. Here's the official jargon: links, affiliate links, and cookies may be used in this post and on this site. Using this site implies your consent. I participate in the Amazon Services LLC Associates Program, Share a Sale, and other affiliate programs; these affiliate advertising programs provide a means for me to earn fees by linking to amazon.com and/or other affiliated sites. This helps offset a small portion of my crafting addiction... uh, hobby. I am truly thankful for your kind support! I also receive free products from my design team companies, possibly monetary compensation, and sometimes free products for review. Regardless, all opinions are my own. Google and Blogger use cookies to provide and improve their services. See Notice at bottom of blog for a longer description and/or see the full Privacy Policy for even more details.

Making the Card

1. Cut watercolor paper to about 4x6 inches or so. I used 5x7 precut sheets. Use Stamp Platform and Antique Linen Distress Ink to stamp Just Dance with Me (Dreamerland Crafts). The Distress Ink will react with water and should just about disappear while painting.

2. Use a Copic Multiliner SP Black .3 pen to trace the eyes, eye brows, and mouths - be sure to do this before coloring or you might not be able to see where to put them. Use gouache to block in colors of the image (I used Holbein and some Arteza - see introduction for more information). You can mix darker and lighter colors trying to blend as you go but you may not get a great gradient. Also, details will be easier to add with color pencil (next step).


3. Once the image has dried, use Polychromos colored pencils to add shading, gradients, and details. I found this especially useful for the hair and cheeks. Keep the pencils out for the next step.

4. Use a pair of detail scissors and a craft knife (on a self-healing mat) to cut around image. Use colored pencils to gently go around outside of image in matching colors to hide white edges.

5. Cut white Soft-Finish Cardstock to 5 1/2 x 8 1/2 inches; fold in half to form a 4 1/4 x 5 1/2 inch card base. I like the soft texture on the front of this cardstock and, since the reverse side is smooth, it is easy to write inside the card. Cut purple plaid paper (Perfectly Plaid Rainbow, Lawn Fawn) to 4 x 5 1/4 inches. Adhere to card base.

6. Die cut white Soft-Finish Cardstock using die from Double-Stitched Circle Set (or other stitched circle set) - see the image below for size. Use the next size up to die cut blue cardstock. Adhere white circle to blue. Adhere to card where shown (if you want to check placement, just hold off gluing until later). Use dimensional/mounting tape to adhere colored image to white circle.

7. Prep a the back of a piece of white Soft Finish Cardstock with powder tool; stamp "Just dance with me" using Purple Hydrangea VersaMagic ink (I recommend using Stamp Platform, especially if you want to stamp on the front of the cardstock where there is texture). Heat emboss using Silver Pearl Ranger Embossing Powder (you may also use clear but the pearl gives it a beautiful subtle shimmer). Die cut with stitched circle. Adhere to card where shown using dimensional/mounting tape.

8. Adhere purple sequins where shown; I recommend using a Crystal Ninja Tanto pick up tool for placement.


Supplies
Follow my blog with Bloglovin so you won't miss any of the dancing fun!

Wednesday, April 3, 2019

Cute Teddy Bear No Line Coloring Birthday Card


Here is a little scene I put together using Dreamerland Crafts stamps, Distress Oxide inks, and Faber-Castell Polychromos colored pencils. I used Memento Desert Sand to stamp the image for no line coloring. It's helpful to have a black stamped image nearby as well in case you can't see some of the lines (I didn't do this and accidentally colored her dress a bit longer in back than it was on the stamp, oops!).

Instead of solvent blending, I used lighter and medium colors to blend over sections that needed smoothing. Overall I kept some of the texture since I liked the look. Since I wanted the focus to be on the main image, I kept the background and card simple. Have you tried no line coloring?

Disclaimer: Please help support my work in this small way - just use my links if you plan to purchase anything - there's no extra cost to you. Here's the official jargon: links, affiliate links, and cookies may be used in this post and on this site. Using this site implies your consent. I participate in the Amazon Services LLC Associates Program, Share a Sale, and other affiliate programs; these affiliate advertising programs provide a means for me to earn fees by linking to amazon.com and/or other affiliated sites. This helps offset a small portion of my crafting addiction... uh, hobby. I am truly thankful for your kind support! I also receive free products from my design team companies, possibly monetary compensation, and sometimes free products for review. Regardless, all opinions are my own. Google and Blogger use cookies to provide and improve their services. See Notice at bottom of blog for a longer description and/or see the full Privacy Policy for even more details.

Making the Card

1. Use Stamp Platform to stamp Cute Teddy Bear in StazOn Jet Black ink on Stamp Masking Paper, leaving stamp mounted for step 2. Fussy cut around image using detail scissors. Use craft knife on a cutting mat to cut around inside areas.

2. Cut a piece of Canson Bristol Paper about 5x6 inches (it doesn't need to be this big but I like to leave some of wiggle room for stamping and die cutting). Stamp Cute Teddy Bear (Dreamerland Crafts stamp set) in Memento Desert Sand ink leaving a bit more room on the left side for flowers and butterflies.

3. Use black Copic Multiliner SP to fill in bear's eye, nose, and mouth and girls's eye and mouth. The SP versions of Multiliners are more economical in the long run as they are refillable and the nibs can be changed - they also reduce the amount of plastic going into land fills. (Note: I used sepia for her mouth and cool gray for her eye; the mouth looks OK but you can't really tell in the eye.)

4. Place mask over image. I recommend working on a craft sheet. Use another mask to make a slight hill. It will start near the bottom of the stump - see photo (you may also use Post-it Tape). I just cut a slight arc with my scissors, keeping both pieces. Cover the bottom while blending the sky, then do the reverse when blending the grass area. With a blending tool using Salty Ocean Distress Oxide ink, start from the top just off the paper using circular motions to create the sky, stopping short of the grass line. Change the masks to blend the grass area in a similar manner using Mowed Lawn and Lucky Clover Distress Oxide inks (using two colors gives it some variation and shading). Remove the mask covering the sky area. Using the same colors for the lawn and the Just Dance with Me (Dreamerland Crafts) grass stamp, use 2nd and 3rd generation stamping to cover the hill side with grass (2nd/3rd generation stamping is done by inking stamp and stamping off on a piece of scrap paper, then, without re-inking, stamping in the image area a couple times for lighter stamping).


5. Stamp butterflies and flowers where shown using stamps from Just Dance with Me. I stamped the butterflies with Ripe Persimmon Distress Oxide ink and flowers with Candied Apple and Mustard Seed. Hint: I used the corner of my stamp pad to ink flowers individually so I could stamp flowers in different colors at the same time. Alternatively, you could ink and stamp each flower one at a time, cleaning stamp in between.

6. Use Faber-Castell Polychromos colored pencils to color image, add stems and leaves to flowers, color centers of flowers, and draw bodies on butterflies. Use a light touch in small oval motions to cover areas with pencil, building up layers. Also blend with pencils, e.g. by going over light colored areas with white or cream pencils to create and blend highlights.

7. Cut black cardstock 5x10 inches; fold in half to form a 5x5 inch card base. Cut patterned paper 4 3/4 x 4 3/4 inches. I used a sheet from My Mind's Eye: Filled with Love but it is likely hard to find; you may want to check out Doodlebug Design's Rainbow Petite Prints papers - they have many colors and light patterns that are perfect for backgrounds. Adhere to card base. Pick out two circular dies, such as those from Hero Arts Infinity Dies Nesting Circle dies, that will fit on the front of the card as shown. To die cut image, use the next smaller Large Dotted Circle Stackables die that will fit inside the two you selected.

8. Use Stamp Platform to stamp Happy Birthday (Dreamerland Crafts Birthday 11) in Memento Tuxedo Black ink where shown on image (note: I cut my sentiment stamp so that I may stack the words - if you don't want to cut your stamp, then you will have to mask or ink selectively). Die cut brown cardstock and black cardstock with selected circle dies; adhere each as shown to the front of the card, with the image on top.


Supplies
Follow my blog with Bloglovin so you won't miss any of the artsy fun!

Sunday, December 23, 2018

Holiday Wishes Copic Colored Winter Card


This sweet image by Dreamerland Crafts reminds me of clear winter nights, looking up at the stars. This could be a holiday card or a simple winter greeting card just by changing the sentiment. I haven't done much Copic coloring on kraft colored cardstock; this Neenah Desert Storm version is lighter than most kraft cardstocks. I think it turned out pretty well. I used 100 lb for the card base but 80 lb for the image. I buy the 250 packs since they are a much better deal than the smaller packs. You have to adjust the colors a bit, compared to working on white, specially the skin colors. Keep a scrap piece handy to test colors.

This card looks even better in person - the glitter really adds some sparkle magic. I was tempted to add glitter to the stars but thought they might look too much like snowflakes.

Disclaimer: Please help support my work in this small way - just use my links if you plan to purchase anything - there's no extra cost to you. Here's the official jargon: links, affiliate links, and cookies may be used in this post and on this site. Using this site implies your consent. I participate in the Amazon Services LLC Associates Program, Share a Sale, and other affiliate programs; these affiliate advertising programs provide a means for me to earn fees by linking to amazon.com and/or other affiliated sites. This helps offset a small portion of my crafting addiction... uh, hobby. I am truly thankful for your kind support! I also receive free products from my design team companies, possibly monetary compensation, and sometimes free products for review. Regardless, all opinions are my own. Google and Blogger use cookies to provide and improve their services. See Notice at bottom of blog for a longer description and/or see the full Privacy Policy for even more details.

Making the Card

1. Cut Neenah Desert Storm 80 lb cardstock to about 4 1/4 x 5 1/2 inches (I had this piece on hand) - I like to have extra room around the image for die cutting. Using a Stamp Platform, stamp Holiday Wishes (Dreamerland Crafts) with Memento Tuxedo Black ink. Use a .3 black Copic Multiliner SP to create hills around the subjects.

2. Color image with Copic markers (see Supply list for colors I used). Use white Gelly Roll pens to add stars to the sky.


3. Die cut image with largest Small Dotted Circle Stackables die. Die cut white glittered cardstock (Recollections) with largest Large Dotted Circle Stackables die. Adhere image to glittered circle using dimensional tape. Set aside until step 5.

4. Cut Neenah Desert Storm 100 lb cardstock to 5 1/2 x 8 1/2 inches; fold in half to form a 4 1/4 x 5 1/2 inch card base.

5. Cut shown background sheet from Checking it Twice (Teresa Collins) to 4 x 4 3/4 inches. This sheet has beautiful red glitter decorating the top (there's also a strip at the bottom of the 12x12 sheet). Adhere to card base. Using VersaMark ink and a Stamp Platform, stamp "Happy Holidays" sentiment (Dreamerland Crafts, Holiday Wishes) on piece of Neenah Desert Storm 80 lb cardstock. Emboss with Red Tinsel Embossing Powder. Trim to a strip; adhere where shown. Adhere image circle where shown.


Supplies
Follow my blog with Bloglovin so you won't miss any of the holiday coloring fun!

Saturday, December 1, 2018

A Boy, a Bear, and a Train Christmas Card


I love this sweet scene of a boy playing with his train along side his bear buddy. I can just imagine him receiving the train set as a Christmas gift - playing with it all morning, as his parents get ready for visitors.

I colored the image using Derwent Coloursoft Pencils and blending with Lavender Spike Oil and blending stumps. The lavender spike oil is very strong smelling so if you don't like strong smells, I don't recommend using it. However, it does not have toxic fumes like many other solvents. It is also clear so I am hoping it does not turn yellow over time (I had this issue with Linseed Oil on my Dragon Get Well Card - sadly it turned yellow after only a few months).

Disclaimer: Please help support my work in this small way - just use my links if you plan to purchase anything - there's no extra cost to you. Here's the official jargon: links, affiliate links, and cookies may be used in this post and on this site. Using this site implies your consent. I participate in the Amazon Services LLC Associates Program, Share a Sale, and other affiliate programs; these affiliate advertising programs provide a means for me to earn fees by linking to amazon.com and/or other affiliated sites. This helps offset a small portion of my crafting addiction... uh, hobby. I am truly thankful for your kind support! I also receive free products from my design team companies, possibly monetary compensation, and sometimes free products for review. Regardless, all opinions are my own. Google and Blogger use cookies to provide and improve their services. See Notice at bottom of blog for a longer description and/or see the full Privacy Policy for even more details.

Making the Card

1. Cut blue cardstock 5 1/2 x 8 1/2 inches; fold in half to form a 4 1/4 x 5 1/2 inch card base. Cut white cardstock 3 3/4 x 5 inches. Cut blue stripe paper (Dot-Stripe) 3 5/8 x 4 7/8 inches; adhere to white cardstock, then adhere to card base as shown.

2. Cut a piece of Strathmore 500 Bristol Plate about 4 1/4 x 5 1/2 inches. Use a Stamp Platform and Memento Tuxedo Black Ink to stamp The Most Wonderful Gift of All (Dreamerland Crafts), leaving room to die cut image later (I actually wish I had stamped mine a bit higher). Use a Copic Multiliner SP .3 to draw a line across background. Optional: you may also draw tongues for the boy and the bear and fill in above each as shown below.


3. Color image using Derwent Coloursoft Pencils and blending stumps dipped in Lavender Spike Oil. You may want to practice blending on a scrap of the same paper before coloring image. The Spike Oil really blends the pencils well - so much so that you have to use a light hand if you want dark areas. I also recommend going over areas again in pencil, not blending with oil, to get a darker color.


4. Use Small Stitched Rectangle Stackables and Large Stitched Rectangle Stackables to die cut image and blue cardstock as shown. Adhere image to blue, then adhere to card base.

5. Use Blueprint Sketch Distress Oxide Ink to stamp "Happy Holidays" sentiment (Miscellaneous 02, Dreamerland Crafts) on strip of blue stripe paper (it may be short but tag should cover this). Trim and adhere to card as shown. Also use Blueprint Sketch to dye a length of White Seam Binding, spraying with water as you do to get ombre effects along ribbon. Set aside to dry.


6. Use 1" circle punch to punch snowflake paper (Polar Pals) then put one side in a 1" Tag Press ring so design is facing front (smooth side), push it the rest of the way in. Use Tag Press to close back. Use Crop-a-Dile (or other small hole punch) to punch a hole in top of tag. Tie bow in seam binding you dyed in step 5. Add tag to loop pin with Snowflake Adornment; pin to back of bow. Use Pop-up Glue Dot under tag and Mini Glue Dot under bow to adhere to card where shown (note if sentiment strip is short, this should cover it).

7. Use snowflake punch (All Over the Page3 Snowflake Punch) to punch some snowflakes from white cardstock; adhere where shown.

Supplies
Follow my blog with Bloglovin so you won't miss any of the toy town fun!

Thursday, July 12, 2018

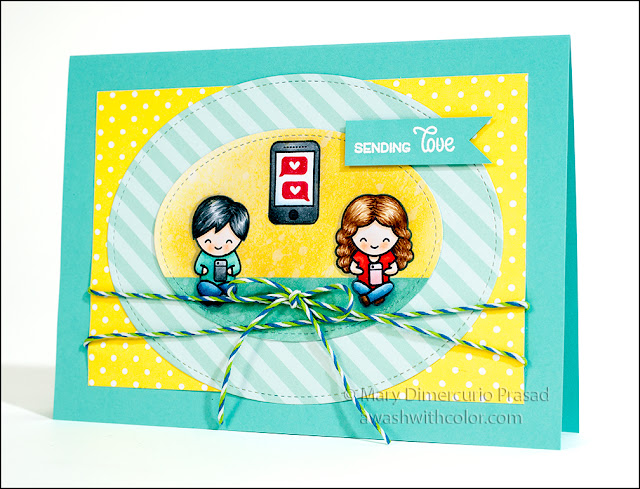
Screen Time Texting Card with Xyron and Lawn Fawn

Xyron, Lawn Fawn Collab - Screen Time Texting Card with Copic

This is a collaboration project between Xyron and Lawn Fawn. Lawn Fawn gave the Xyron Design
Team a $25 credit to spend on their website. They also sent us a couple sheets of paper and a length of trimmings (twin) to play with. I ordered the Screen Time stamp set and a couple small dies (not used on this card). I bought the other stamps and dies myself. I'm a huge fan of Lawn Fawn and have a big collection of their stamps, dies, papers, and trimmings. They have high quality (not to mention, adorable) products; I find myself reaching for them often!


For this card, I thought it would be fun to do a little Distress Oxide ink blending in the background using colors to match the papers I was sent. I then colored the main image with Copic markers. Since the images were so simple, I just used Post-it removable labeling tape for my masks (if you are careful, you can re-use them; I just stuck mine on the back of the stamp set).

Disclaimer: Links, affiliate links, and cookies, including those for personalized ads, may be used in this post and on this site. Using this site implies your consent. I participate in the Amazon Services LLC Associates Program, Share a Sale, and other affiliate programs; these affiliate advertising programs provide a means for me to earn fees by linking to amazon.com and/or other affiliated sites at no cost to you. This helps offset a very small portion of my crafting addiction... uh, hobby. I am truly thankful for your kind support! I also receive free products from my design team companies, possibly monetary compensation, and sometimes free products for review. Regardless, all opinions are my own. Google and Blogger use cookies to provide and improve their services. See Notice at bottom of blog for a longer description and/or see the full Privacy Policy for even more details.

Making the Card

1. Cut blue/green cardstock 7x10 inches; fold in half to form a 5x7 inch card base.

2. In Memento Tuxedo Black ink, stamp boy and girl from Screen Time and cell phone from Love Letters on Post-it Tape (or Masking Paper). Use detail scissors to fussy cut around images (I cut just inside of the outer line). Stamp again, in arrangement shown, on X-Press It Blending card (or other alcohol marker friendly cardstock), leaving extra room for die cutting around it (a piece about 5x7 inches should allow you some wiggle room). I recommend using a Stamp Platform or Stamp Positioner. Hint: you may want to draw a pencil guide around the second largest die from Small Stitched Oval Stackables, just be sure to erase before inking background. Cover images with masks. Note: check that ink is dry on all masks before proceeding; I used a heat tool to set it.

3. Using a longer piece of Post-it Tape, place the top edge just above the boy's and girl's knees. Use a blending tool with Fossilized Amber Distress Oxide Ink to blend background, starting from the middle on the Post-it Tape moving in circles up and out. Use the same piece of Post-it Tape on the clean side to cover the blended area starting at the line (hint: leave a small sliver showing so there won't be a white line when finished). Blend bottom with Evergreen Bough Distress Oxide Ink. Optional: to give the background some texture, lightly flick a little water over the image then dab with a paper towel. This is a little risky as the water may seep under the masks along with the ink - it happened to me in a couple places but I was able to hide it with my coloring.

Xyron, Lawn Fawn Collab - Screen Time Texting, Distress Oxide Ink

4. Remove masks. Use Copic markers B91 and the 0 Blender to add a little shading around inside of cell phone screen. Stamp heart talk bubbles as shown in VersaFine Clair Glamorous Ink. Stamp small cell phones from Screen Time in boy's and girl's hands (I chose to make them right handed so they are holding their cell phones in their left hands).

5. Color images with Copic markers. The list of colors I used is at the bottom of Supplies. In order to make the boy's shirt a similar green to the background, I had to mix a few colors. Once finished, die cut using 2nd largest die from Small Stitched Oval Stackables.

6. Die cut blue/green striped patterned paper (Let's Polka in the Meadow Collection) using largest die from Large Stitched Oval Stackables. Cut small yellow polka dot paper 4x6 inches.


7. Run the die cut/colored image along with the two pieces of patterned paper cut in step 6 through the Xyron Creative Station with Permanent Adhesive (see photo above). Rub around edges before peeling away top film sheet. Carefully remove the striped oval and center it on the yellow polka dot rectangle, keeping the latter on the backing sheet. Next peel off colored image and stick to center of striped oval. Finally peel away the backing from the whole group but don't stick to card base yet; wrap a length of trimmings around this as shown and tie a bow in front and trim excess. Adhere to center of card base. Hint: you may want to use a liquid glue to keep bow in place as well as enforce the ends of the trimmings (I just put a little on my fingers and twist the ends with the grain).

Xyron, Lawn Fawn Collab - Screen Time Texting Card with Copic

8. Stamp "sending Love" (Love Letters) in VersaMark ink on a strip of blue/green cardstock. Use white embossing powder and a heat tool to emboss (I highly recommend first prepping the paper with a powder tool); trim if necessary and add tails with detail scissors. Adhere to card where shown using foam tape (see video below).


Supplies
Follow my blog with Bloglovin so you won't miss any of the texting fun!

Wednesday, March 14, 2018

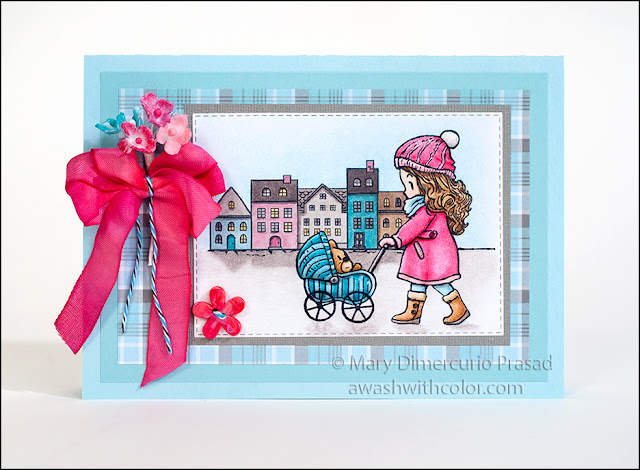
Winter Greeting Card with Prismacolor Pencils

Dreamerland Crafts Stamp Colored with Prismacolor Colored Pencils

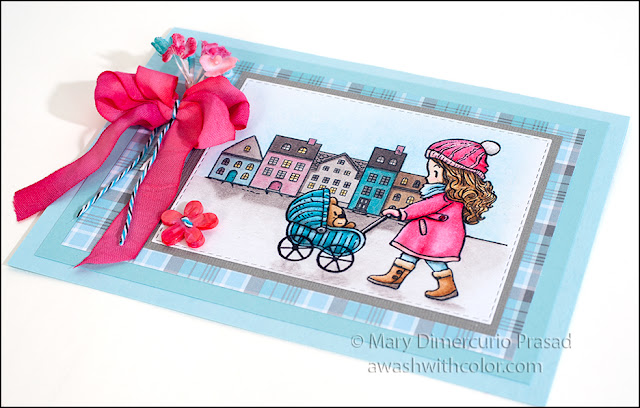
I love this adorable image by Dreamerland Crafts. I made it as a generic card so any greeting could be stamped inside (or just a handwritten message). I used Prismacolor colored pencils to color the image and Chelsea Classic Studio Walnut Oil with blending stumps to blend the colored pencil for a smooth look. This oil is non toxic and low odor, much safer to use than other solvents, such as (odorless) mineral spirits. I also did a quick comparison to Sansodor. The comparison chart is below the step-by-step.

Affiliate links may be included in this post. I participate in the Amazon Services LLC Associates Program, Share a Sale, and other affiliate programs; these affiliate advertising programs provide a means for me to earn fees by linking to amazon.com and/or other affiliated sites at no cost to you. This helps offset a small portion of my crafting addiction... uh, hobby. I am truly thankful for your kind support! I also receive free products from my design team companies. Regardless, all opinions are my own. I do not get paid for my posts unless otherwise specified. Cookies may be used on this site. See notice at bottom of blog for a longer description.

Making the Card

1. Cut light blue cardstock 7x10 inches; fold in half to form a 5x7 inch card base. Cut light turquoise cardstock 4 1/2 x 6 1/2 inches; adhere to card base. Cut plaid patterned paper 4x6 inches; adhere to card base in center of light turquoise.

2. Cut white cardstock about 4 1/4 x 5 1/2 inches. Watch video below; it compares walnut oil to Sansodor for blending. After the blending comparison I go into stamping and coloring the image.


Video Steps:
3. Die cut image with stitched rectangle (Rubbernecker Stamps Small Stitched Rectangle Dies). Cut gray cardstock 1/4 inch larger than die cut image. Adhere image to gray cardstock.

4. Cut enough seam binding to make a bow with three loops and tails. Use Picked Raspberry and Festive Berries Distress Inks (plus optional Worn Lipstick Distress Oxide ink) to dye seam binding. I used a small mister bottle with water to wet the inks and seam binding as I went along the length of seam binding. Set aside to dry.

Dreamerland Crafts Stamp Colored with Prismacolor Pencils

5. Use Distress Inks Picked RaspberryFestive BerriesPeacock Feathers, and Tumbled Glass (plus optional Worn Lipstick Distress Oxide) to color bouquet flowers. I used cotton swabs to apply the colors.

6. Cut several inches of blue/white/black twine - this will be used to tie around ribbon. Wrap dyed seam binding around 2 or 3 fingers three times - leaving enough for tails. Pull off fingers carefully, grasp in middle. Tie twine around and secure with knot. Fluff loops.

7. Thread twine through hole in button. Trim and adhere on back with Glue Dot (you may also tie a knot but it might make it more difficult to adhere it flat on the card).

8. Adhere bouquet flowers, bow, and button using permanent Glue Dots, where shown.

Distress Ink and Distress Oxide Ink used to color seam binding ribbon

Comparing Walnut Oil to Sansodor

In the video you can see me blending the colored pencil using walnut oil with blending stumps. Walnut oil is non-toxic and does not give off harmful fumes like other solvents. Sansodor, although as the name implies doesn't have much odor, gives off harmful fumes and must be used in a well ventilated area. It is a toxic substance, poisonous if swallowed (possibly fatal), harmful if inhaled, and harsh on the skin. Walnut oil is flammable (as many oils are) so care should be used when disposing of oil-soaked rags and other items, otherwise it is safe to use.

I would say that the blending is comparable between walnut oil and Sansodor. It is slightly easier with Sansodor but I definitely don't think using it is worth the added risks. When blending lightly colored layers, I actually preferred the walnut oil. See the chart below. The first (unlabeled) rows are straight pencil with no additional blending. The "W" rows were blended with walnut oil; the "S" rows were blended with Sansodor. I also wrote the Prismacolor pencil numbers I used next to each section.

The first rows on the left are simple gradient's of one color (208). Next to them on the right are light layers (pencils 208 and 925). The yellow to red and yellow to blue rows were colored pretty heavily. The walnut oil mostly took off the top layer of red over the heavy yellow, although Sansodor did something similar in the yellow to blue row. When colors were applied lightly (right side), they blended much more smoothly.

I will likely be trying linseed oil and lavender spike oil for blending


Supplies
Follow my blog with Bloglovin so you won't miss any of the Prismacoloring fun!