Showing posts with label Card. Show all posts

Monday, June 24, 2024

Bunny Easter Card with Xyron Adhesive and Doodlebug


This is my first post for the Xyron Design Team! I love Xyron adhesives (and lamination!). I have a 9 inch Creative Station that also accepts 5 inch cartridges. I have an old 9 inch Xyron as well - still in working condition - my husband uses it a lot to make player aids and other stuff for board gaming. The new design is much more compact - great for a craft room!

I like to add permanent adhesive to cardstock and paper before die cutting, or add it to die cuts that I cut using my electronic cutters (Silhouette Cameo, Cricut Maker). Instant stickers! This makes it easier to assemble, especially when there are lots of pieces.

The theme for this card is Spring/Easter. I chose to use Doodlebug Design Bunnyville paper (6x6 pad). This formed the color palette for my card. I used Karen Burniston's Twist Panel Pop-up dies for the inside of the card - a fun surprise when opened!


Copyright Notice: ©Mary Dimercurio Prasad. All rights reserved. Any illegal reproduction of this content, including images, will result in immediate legal action.

Disclaimer:  Please help support my work in this small way - just use my links if you plan to purchase anything - there's no extra cost to you. Here's the official jargon: links, affiliate links, and cookies may be used in this post and on this site. Using this site implies your consent. I participate in the Amazon Services LLC Associates Program, Share a Sale, and other affiliate programs; these affiliate advertising programs provide a means for me to earn fees by linking to amazon.com and/or other affiliated sites. This helps offset a small portion of my crafting addiction... uh, hobby. I am truly thankful for your kind support! I also receive free products from companies, possibly monetary compensation, and sometimes free products for review. Regardless, all opinions are my own. Google and Blogger use cookies to provide and improve their services. See Notice at the bottom of this blog for a longer description and/or see the full Privacy Policy
 for even more details.
Making the Card

1. I looked through my library of SVG files to find a bunny that closely matched the one in the Doodlebug Design Bunnyville paper pad. I chose to use the Easter Bunny from Miss Kate Cutables. I didn't want the cheeks, mouth, or shading though. I also wanted to add a bow and outfit to more closely resemble one of the bunnies in the paper pad designs. I used the "easter bunny-apart" SVG file and cut it with my Silhouette Cameo.

Used the Silhouette software to edit the file. First resize the image (I think I used 3 inches in height - just use the grid to measure one of the bunnies as you drag one corner until you have the size you want), then ungroup the image to separate the images. I deleted all images I didn't want (i.e. remove all but the simple eggs and delete bunnies 3, 4, and 5 counting from the left). Note: in my screen shot further below, you will see an extra white bunny layer, without a face but with ears cut out, on the right - I didn't end up using it; my original intention was to use it for filling in the eyes and nose but the pink bunny layer worked well enough for this, as you will see. Just cut the white bunny (ears filled in) on the right with pink cardstock (you can change the fill to pink if you like).

To edit the points, first select the layer to edit then click the tool below the move tool - if you hover over it, it says "Edit Points." Now you can click on points and drag to move, remove them (delete), or change the curves (by moving attached handles). I deleted all points for mouth and cheeks. Holding the control key while clicking brings up a menu (I used a Mac; this is the same as a right click). In hindsight, I wish I had made the eye holes bigger and moved the face further down. The eyes are not as big as they look in the original image above. Note: the colors do not matter - the cardstock that you cut does. I changed the fill (color) to match what I wanted in the final cuts. Again, you really only need three bunnies, the one with the face, the outline, and the white one (which I made pink).


Optional: to make a girl bunny, I found a file with a bow and edited/resized it. If you don't have one, just skip this and make a boy bunny with blue clothes. My file before cutting looks like the one below (you may want to save the file before proceeding to cut).


2. On your Silhouette cutting mat, arrange the cardstock and patterned papers. I cut each piece a little bigger than necessary to give me some wiggle room. Place each piece on the physical mat to match its corresponding image placement on the software mat grid. For example, the grass is between 4 and 5 1/2 inches vertically and between 0 and 3 inches horizontally. I added green patterned paper in this area. Your cursor should have lines going in each direction so you can read the positions on the rulers easily.

Cardstock and Papers Used
  • White bunny: white cardstock
  • Gray outline: light gray cardstock
  • Pink bunny: pink cardstock
  • Grass and ground: Gingham-Linen Rainbow Petite Prints
  • Blue and orange eggs: Gingham-Linen Rainbow Petite Prints
  • Yellow and pink eggs: Dot-grid-daisy-stripe Rainbow Petite Prints
  • Girl bunny clothes: Dot-grid-daisy-stripe Rainbow Petite Prints
Silhouette mat with cardstock and patterned paper (don't need right white piece)

After cutting and removing most of the scrap parts

3. After cutting all the pieces, run them through the Xyron 9" Creative Station with Permanent Adhesive (you could use a 5" cartridge instead). If I have a lot of pieces, even small ones, I put them through my larger machine - I just use something like a bone folder to scoot them in so they touch the adhesive area before rolling them through. Alternatively, you may use the Xyron 1.5" Sticker Maker for small items.

Put pieces into Xyron 9" Creative Station

Use a bone folder or other tool to push small pieces further in

Die cuts after going through Xyron Creative Station plus Xyron Sticker Maker with blue egg

4. To make the card base, cut yellow cardstock 4 1/4 x 11 inches; fold in half to form a 4 1/4 x 5 1/2 inch top folding card base. Cut light blue cardstock 3 3/4 x 5 inches. Cut bunny/chick/sun patterned paper from Bunnyville 6x6 pad to 3 1/2 x 4 3/4 inches; adhere to light blue using Xyron Mega Runner. Adhere to front of card with Mega Runner.


5. Using rectangle die from Twist Panel Pop-up, die cut light blue cardstock; adhere to card front near center bottom as shown. Assemble Easter Bunny as follows:

Cut the body off the pink bunny at the chin, rounding from one side to the other with the shape of the head. You will use the body for the bunny clothes. On the white bunny, line up the light gray outline at the ears - only stick down the ears, leave the rest up. Line up the pink body with the feet and arms but do not press down. Gently put the gray outline over this and trace inside arms and legs (try not to get any pencil on the gray outline).

Pencil in lines as guides for cutting clothes

Remove the pink body and trim inside the lines to make clothes that fit over the bunny's belly. Check your cutting and retrim if necessary.

Trimmed down pink clothes

Line up ears of white bunny on pink head but do not press down yet. Use a pencil to lightly mark the eye locations (I marked it darker in the photo so it would show up). Use a brown alcohol marker (I used First Edition Graphic Markers 51 Chestnut; you could use Copic Sepia E37) to color where eyes will be. Be careful not to get any in the nose area. Adhere white layer over pink. Adhere bow where shown if desired.

Add brown marker behind eye area

Optional: once I had a template, I used it to cut the pink flowered pattern from Dot-grid-daisy-stripe Rainbow Petite Prints - you could leave it pink cardstock or trace it on blue if you want to make a boy bunny. Stick down the clothes then the outline.

Use template to cut flower pattern paper

Bunny with new clothes

6. Adhere grass ground (long oval) at bottom of blue frame on card front. Adhere grass where shown, then eggs and finally bunny.


7. Cut out "hippity, hoppity, Easter's on it's way!" label from Bunnyville 6x6 pad. Trim sides so dots are about 1/8 inch all the way around. Use 1/4 inch Corner Chomper to round the corners. Use foam tape to pop up label on card; see video below.


8. Create the inside card using Twist Panel Pop-up dies. Cut light blue cardstock 3 3/4 x 11 inches; fold in half. This will be the inside liner on which the pop-up mechanism (die cut) will go. Watch the video below before assembling. The cardstock and papers I used are listed below the video.


Pop-up arms: light blue cardstock
Pop-up panels: yellow cardstock
Panels are all decorated with patterned paper from Bunnyville
1st Panel: sunshine paper cut with rectangle die, square house scene with 1/4 inch rounded corners
2nd Panel: Easter words cut with rectangle die
3rd Panel: animal stack with 1/2 inch rounded corners
4th Panel: jelly beans cut with rectangle die, square "Happy Easter" (trim excess)
Top decoration: bunny family with 1/2 inch rounded corners
Banner flags: triangle - flower, chick, girl bunny; fishtail - boy bunny, flowers, sunshines

I used my Mega Runner for most of the adhesive and liquid glue for the rest (e.g. to glue twine behind panels). To sting the banners, cut a small slit in the middle of the curves, top left 1st panel, top right 2nd panel, top left 3rd panel, top right 4th panel. String the banner flags along the pink/white twine before securing. Once you are happy with how it is strung, glue twine from behind and trim of any excess.


Supplies
Follow my blog with Bloglovin so you won't miss any of the bunny fun!
SaveSave

Wednesday, October 21, 2020

Doodlebug Design Quick Card - Stuck on You

Doodlebug Design Quick Card - Stuck on You

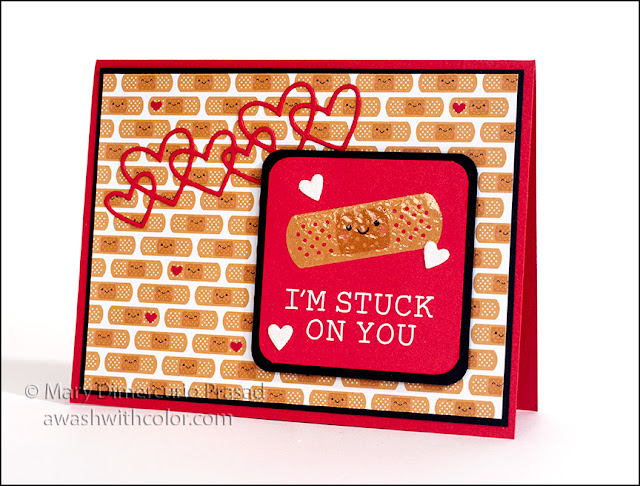
Here's another fairly quick card using Doodlebug Design papers. So Much Pun is part of their "punny" collection, along with So Punny. They have a page or two in each pack that can be cut apart for easy additions to cards. I made this particular card for my husband. I just love how cute and colorful Doodlebug Design products are!

Copyright Notice: ©Mary Dimercurio Prasad. All rights reserved. Any illegal reproduction of this content, including images, will result in immediate legal action.

Disclaimer:  Please help support my work in this small way - just use my links if you plan to purchase anything - there's no extra cost to you. Here's the official jargon: links, affiliate links, and cookies may be used in this post and on this site. Using this site implies your consent. I participate in the Amazon Services LLC Associates Program, Share a Sale, and other affiliate programs; these affiliate advertising programs provide a means for me to earn fees by linking to amazon.com and/or other affiliated sites. This helps offset a small portion of my crafting addiction... uh, hobby. I am truly thankful for your kind support! I also receive free products from companies, possibly monetary compensation, and sometimes free products for review. Regardless, all opinions are my own. Google and Blogger use cookies to provide and improve their services. See Notice at the bottom of this blog for a longer description and/or see the full Privacy Policy for even more details.

Making the Card

1. Cut red cardstock 5 1/2 x 8 1/2 inches; fold in half to form a 4 1/4 x 5 1/2 inch card base. Cut black cardstock 4 x 5 1/4 inches for mat; set aside. In the So Much Pun 6x6 paper pad, find the page with the smiling bandages.  Cut to 3 7/8 inches tall first, watching orientation of bandages (i.e. cut off top or bottom). Next cut to 5 1/8 wide, keeping the leftover strip of bandages for the inside of the card. Adhere to black mat then adhere to card base.

2. From red cardstock, die cut Linked Hearts. Adhere where shown on card base. You may want to wait until you do step 3 before placing and gluing hearts. Note: the hearts I used have been discontinued but I put an alternative in the Supplies list; you may have to change the orientation of these hearts and the pun in step 3.

Doodlebug Design Quick Card - Stuck on You

3. In the So Much Pun 12x12 Paper Pack, find the sheet of square puns and cut out the "I'm stuck on you" pun. Cut black cardstock slightly larger (I just put the pun in a corner of the cardstock, with the amount of space I wanted on the cut sides, then put pencil marks on the other sides to match, and cut). Use the Crop-A-Dile Corner Chomper Tool to round the corners 1/4 inch on both the pun and the black cardstock; adhere together. Adhere to card base as shown using dimensional tape.

4. Optional, use Wink of Stella on main bandage. Once dry, add Glossy Accents over same bandage.

5. From white glitter cardstock, die cut triple hearts using Coffee Charms die. Adhere where shown.

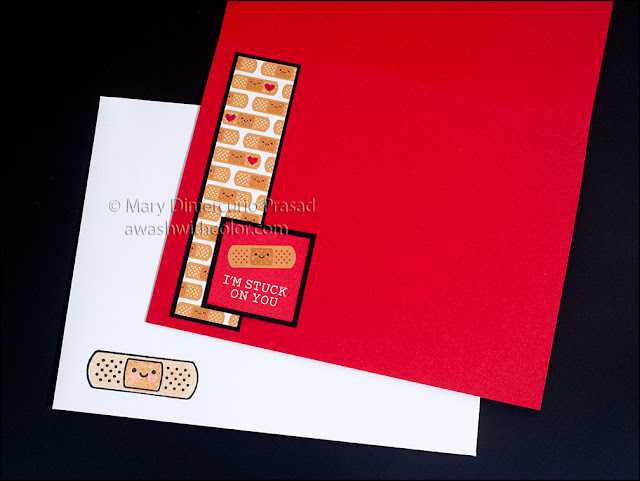
6. Cut red paper with Envelope Liner die for A2 card (sorry, inside liner is not shown). Set aside small red hearts. Make an A2 envelope from white paper using Envelope Board - leave unassembled (assembly in step 7). Stamp bandage and face on front bottom left corner with Memento Tuxedo Black ink (may want to fold envelope temporarily to note where to stamp but lay it all flat again for stamping). Color image with colored pencils.

Doodlebug Design Quick Card - Stuck on You

7. Adhere liner to inside envelope then assemble envelope. Use a bone folder to help with folds.

8. For the inside of the card (image further below), cut a black mat slightly larger than the saved strip of bandages. Adhere together than to inside of card where shown. In the So Much Pun 6x6 Paper Pack, find the sheet of square puns (matching the 12x12 for the front of the card) and cut out the "I'm stuck on you" pun. Cut black cardstock slightly larger; adhere together then adhere inside of card where shown.

9. To add a little more detail to the small bandages on both the front of the card and on the inside strip, glue small red hearts (saved from step 6) as shown. You may have to look closely to see them. Your pattern may vary somewhat depending on how the pattern was printed and cut on your particular sheet. I recommend placing all hearts first then gluing then down once you like the placement. I put 5 on the front and 3 inside the card.

Saturday, December 1, 2018

A Boy, a Bear, and a Train Christmas Card


I love this sweet scene of a boy playing with his train along side his bear buddy. I can just imagine him receiving the train set as a Christmas gift - playing with it all morning, as his parents get ready for visitors.

I colored the image using Derwent Coloursoft Pencils and blending with Lavender Spike Oil and blending stumps. The lavender spike oil is very strong smelling so if you don't like strong smells, I don't recommend using it. However, it does not have toxic fumes like many other solvents. It is also clear so I am hoping it does not turn yellow over time (I had this issue with Linseed Oil on my Dragon Get Well Card - sadly it turned yellow after only a few months).

Disclaimer: Please help support my work in this small way - just use my links if you plan to purchase anything - there's no extra cost to you. Here's the official jargon: links, affiliate links, and cookies may be used in this post and on this site. Using this site implies your consent. I participate in the Amazon Services LLC Associates Program, Share a Sale, and other affiliate programs; these affiliate advertising programs provide a means for me to earn fees by linking to amazon.com and/or other affiliated sites. This helps offset a small portion of my crafting addiction... uh, hobby. I am truly thankful for your kind support! I also receive free products from my design team companies, possibly monetary compensation, and sometimes free products for review. Regardless, all opinions are my own. Google and Blogger use cookies to provide and improve their services. See Notice at bottom of blog for a longer description and/or see the full Privacy Policy for even more details.

Making the Card

1. Cut blue cardstock 5 1/2 x 8 1/2 inches; fold in half to form a 4 1/4 x 5 1/2 inch card base. Cut white cardstock 3 3/4 x 5 inches. Cut blue stripe paper (Dot-Stripe) 3 5/8 x 4 7/8 inches; adhere to white cardstock, then adhere to card base as shown.

2. Cut a piece of Strathmore 500 Bristol Plate about 4 1/4 x 5 1/2 inches. Use a Stamp Platform and Memento Tuxedo Black Ink to stamp The Most Wonderful Gift of All (Dreamerland Crafts), leaving room to die cut image later (I actually wish I had stamped mine a bit higher). Use a Copic Multiliner SP .3 to draw a line across background. Optional: you may also draw tongues for the boy and the bear and fill in above each as shown below.


3. Color image using Derwent Coloursoft Pencils and blending stumps dipped in Lavender Spike Oil. You may want to practice blending on a scrap of the same paper before coloring image. The Spike Oil really blends the pencils well - so much so that you have to use a light hand if you want dark areas. I also recommend going over areas again in pencil, not blending with oil, to get a darker color.


4. Use Small Stitched Rectangle Stackables and Large Stitched Rectangle Stackables to die cut image and blue cardstock as shown. Adhere image to blue, then adhere to card base.

5. Use Blueprint Sketch Distress Oxide Ink to stamp "Happy Holidays" sentiment (Miscellaneous 02, Dreamerland Crafts) on strip of blue stripe paper (it may be short but tag should cover this). Trim and adhere to card as shown. Also use Blueprint Sketch to dye a length of White Seam Binding, spraying with water as you do to get ombre effects along ribbon. Set aside to dry.


6. Use 1" circle punch to punch snowflake paper (Polar Pals) then put one side in a 1" Tag Press ring so design is facing front (smooth side), push it the rest of the way in. Use Tag Press to close back. Use Crop-a-Dile (or other small hole punch) to punch a hole in top of tag. Tie bow in seam binding you dyed in step 5. Add tag to loop pin with Snowflake Adornment; pin to back of bow. Use Pop-up Glue Dot under tag and Mini Glue Dot under bow to adhere to card where shown (note if sentiment strip is short, this should cover it).

7. Use snowflake punch (All Over the Page3 Snowflake Punch) to punch some snowflakes from white cardstock; adhere where shown.

Supplies
Follow my blog with Bloglovin so you won't miss any of the toy town fun!

Tuesday, November 13, 2018

Waffle Flower Perfect Blend Card with Xyron


This is a collaboration post between Waffle Flower and Xyron. Waffle Flower sent the Xyron Design Team some stamp sets and/or dies. I chose the new Hello Pumpkin stamp set along with a mini stamp set Coffee Time. I thought these would go well together since Hello Pumpkin also had some coffee themed stamps. The mice are so cute! I decided to color them with Copic markers. I also added a couple coffee charms and a coffee cup pop-up by Karen Burniston. The Doodlebug Design papers Cream & Sugar was the perfect compliment for backgrounds.

Disclaimer: Please help support my work in this small way - just use my links if you plan to purchase anything - there's no extra cost to you. Here's the official jargon: links, affiliate links, and cookies may be used in this post and on this site. Using this site implies your consent. I participate in the Amazon Services LLC Associates Program, Share a Sale, and other affiliate programs; these affiliate advertising programs provide a means for me to earn fees by linking to amazon.com and/or other affiliated sites. This helps offset a small portion of my crafting addiction... uh, hobby. I am truly thankful for your kind support! I also receive free products from my design team companies, possibly monetary compensation, and sometimes free products for review. Regardless, all opinions are my own. Google and Blogger use cookies to provide and improve their services. See Notice at bottom of blog for a longer description and/or see the full Privacy Policy for even more details.

Making the Card

1. Cut light gray cardstock 4 1/4 x 11 inches; fold in half to form a 4 1/4 x 5 1/2 inch card base. Cut light brown/kraft cardstock as follows: one 4 x 5 1/4 inches, two 4 x 5 5/16 inches, and one 2 3/8 x 3 1/2 inches. Cut Coffee Time paper (Cream & Sugar 12x12 Paper Pack) first 5 1/4 x 12 inches, then cut two off at 3 7/8 inches (they will be 3 7/8 x 5 1/4 inches) and one 3 7/8 x 5 1/8 inches. The smaller 5 1/4 x 12 will be for the front of the card so you will use the coffee cup side. The two 3 7/8 x 5 1/4 inch pieces will be used for the inside of the card on the coffee bean side. Orient the pieces as they will be inside the card. Use an ink blending tool to add Walnut Stain Distress Ink to outside edges, leaving the two edges towards the fold with just ink on the very edge. Note: I cut my pieces too short so there is a bigger gap along the fold in my card - I thought it would look better without the gap so I adjusted the measurements accordingly. Cut the coffee cup strip from the page of strips (Cream & Sugar 6x6 Pad); trim to 4 inches. Cut a strip of pink paper 1/8 inch larger (so it will stick out above/below the coffee cup strip at 1/16 inch on either side) by 4 inches. Cut Neenah Solar White cardstock 5/8 x 4 inches. Set aside for now.


2. Cut alcohol marker friendly cardstock (Neenah Solar White) about 2 1/2 x4 inches - you might want to lightly pencil in lines for an area 1 7/8 x 3 3/8 inches - this will be the final size; I like to add a little extra for coloring and wiggle room for cropping. Using a Stamp Platform, arrange mice, then add in coffee cups where their hands will hold them, gently moving mice out of way. I snugged these stamps right up next to each other. Stamp with Memento Tuxedo Black ink. At this time, you may also create a mask by stamping on masking paper or Post-it Tape then fussy cutting with detail scissors; alternatively you can just wipe the ink off the hands of the mice that will hold the beverages before stamping them. Remove beverage stamps, arrange mice, then stamp with Memento Tuxedo Black ink. Draw line for ground using a Copic Multiliner SP Black .3 (I prefer the SP versions - refillable, less waste, and more economical in the long run). Color image with Copic markers (see Supplies for the list of colors I used). Trim to 1 7/8 x 3 3/8 inches. Attach to 2 3/8 x 3 1/2 inch light brown piece (step 1) using Tape Runner or Mega Runner. Add glossy accents to mouse's glasses and pink coffee cup. Set aside to dry.


3. See photo below. Cut Neenah Solar White cardstock about 5x5 inches. Cut light brown cardstock 2 1/4 x 4 inches. Cut light gray cardstock 1 1/2 x 4 inches. Cut craft foam about 3x4 inches. From Coffee Cup Pop-up, die cut light blue/green cardstock using zig-zag circle. Watching which side should be up on patterned paper, run all cardstock/paper (except card base) from step 1, craft foam, and cardstock from this step through 9" Creative Station with permanent adhesive (you could put the strips through the 1.5" Sticker Maker instead). Cut pieces apart from each other (this will make it easier to die cut later). Adhere 3 7/8 x 5 1/8 inch Coffee Time paper to 4 x 5 1/4 inch light brown paper with coffee cup side showing; adhere to front of card. Note: pull backing away from cardstock/paper so they won't bend as much. If there is any sticky residue, use Adhesive Remover - it works really well. Adhere two light brown pieces (4 x 5 5/16 inch) pieces inside card on either side of fold, allowing a very small gap for fold. Adhere coffee bean papers (remember that mine have a bigger gap near the fold - yours should line up with the brown next to the fold).


4. Using Coffee Charms dies, die cut whipped cream, paper cup, and circle label from Neenah Solar White cardstock, coffee cup from pink cardstock, coffee lid from light gray cardstock, and coffee sleeve from light brown cardstock. Emboss coffee sleeve if desired then use Copic E34 to highlight lines. Use Copic T3 to add shading to whipped cream and color bottom half of coffee lid. Using Coffee Cup Pop-up stir stick die, cut 3 hearts from pink paper. Run hearts, small coffee cup sleeve, and label through 1.5" Sticker Maker (see photo above, bottom - left of center; note I ran the hearts through separately). Adhere one heart to label, label to sleeve, then sleeve to paper coffee cup as shown in photo of front of card. Use liquid glue to attach lid to paper coffee cup and whipped cream to pink coffee cup. Run both coffee cups through 1.5" Sticker Maker. Adhere pink coffee cup to blue/green zig-zag circle (step 3); cut sticky backed craft foam to fit behind coffee cup with sleeve and stick coffee cup to it then stick to zig-zag circle as shown. Cut sticky backed craft foam to fit behind zig-zag circle; stick circle to it but do not add to card just yet.


5. Watch video below before die cutting and assembling so you know what you will be doing, but don't do anything else yet. After watching the video, use the Coffee Cup Pop-up dies to cut white cardstock (65 lb recommended) using main coffee cup die. Using adhesive cardstock from step 3, die cut 2 napkin pieces, and plain circle from Neenah Solar White cardstock, coffee sleeve and coffee beans from light brown, and coffee lid from light gray. Use an ink blending tool to add a little Walnut Stain Distress Ink to outsides of coffee beans. Emboss coffee sleeve as shown in video. Use Copic E34 to add lines. Use T3 to shade bottom half of coffee lid. Adhere sleeve to front of pop-up coffee cup (if you are using it as a gift card holder, be aware of gift card tab orientation and adjust accordingly). Adhere lid. Assemble coffee cup on napkin and adhere inside card as shown in video. Adhere three coffee beans where shown (see photos of inside of card).


6. Look at coffee sleeve label in photo below. Die cut dotted circle (Coffee Cup Pop-up) from Neenah Solar White cardstock (without adhesive). On the plain sticky backed circle (step 5), stamp "you & me" (Hello Pumpkin) in Memento Tuxedo Black ink (use Stamp Platform to center). Add heart as shown. Cut sticky backed craft foam piece big enough to go behind circle; peel backing from circle then stick to craft foam on its non sticky side. Stick to dotted circle and glue to coffee sleeve as shown in video. Stamp coffee cup (Coffee Time) on sticky backed Neenah Solar White cardstock. Color with Copic markers. Fussy cut around cup using detail scissors. Use Tuxedo Black Memento Marker to go around outside from back to get rid of white edges. Stamp "perfect blend" (Hello Pumpkin) in Memento Tuxedo Black on white strip 5/8 x 4 inches, leaving room for coffee cup on left, coffee bean on right, and heart above - see photo below. Add to card where shown; adhere coffee cup, coffee bean, and heart. Adhere strip of coffee cups to pink strip; adhere to top inside card where shown.


7. To finish the front of the card, cut a strip of light brown paper, about 3/8 x 2 1/2 inches. Place strip in Stamp Platform. Apply powder tool to strip. Using VersaMark ink stamp "COFFEE TIME" (Coffee Time) near left end, leaving about 3/8 inch. Heat emboss in white. Cut tails on right side with detail scissors. Cut a strip of sticky backed craft foam to fit under Coffee Time label. Adhere where shown, along with zig-zag circle with coffee cups (step 4). Adhere mouse scene to bottom of card front as shown using Tape Runner or Mega Runner (if you didn't run it through 9" Creative Station already).


Supplies
Follow my blog with Bloglovin so you won't miss any of the coffee blending fun!

Wednesday, October 31, 2018

Dog Lover Masculine Birthday Card


One of my first thoughts was of Fall when I saw this super adorable image by Dreamerland Crafts. I paired it with some plaid Halloween paper by Tim Holtz and Idea-ology. I decided to watercolor the image (with M. Graham watercolors), mainly so I could mix colors that would closely match those in the plaid background. I also tried to keep it to a limited palette.

For the painting itself, I used a fairly dry brush technique and glazing to get smooth transitions, building up the layers in the dark areas for contrast. I am working on a watercolor series on my YouTube channel - eventually I hope to show this technique. If you are interested in watercolor, you may want to consider subscribing to my channel so you won't miss anything (hit the bell icon, then you will get notifications when I post).

Disclaimer: Please help support my work in this small way - just use my links if you plan to purchase anything - there's no extra cost to you. Here's the official jargon: links, affiliate links, and cookies may be used in this post and on this site. Using this site implies your consent. I participate in the Amazon Services LLC Associates Program, Share a Sale, and other affiliate programs; these affiliate advertising programs provide a means for me to earn fees by linking to amazon.com and/or other affiliated sites. This helps offset a small portion of my crafting addiction... uh, hobby. I am truly thankful for your kind support! I also receive free products from my design team companies, possibly monetary compensation, and sometimes free products for review. Regardless, all opinions are my own. Google and Blogger use cookies to provide and improve their services. See Notice at bottom of blog for a longer description and/or see the full Privacy Policy for even more details.

Making the Card

0. Note: I made my card with the retired Sizzix Framelits Die Set 14PK - Card, Kind Sentiments Step-Ups (660718). I found a set on the Sizzix site that I believe matches fairly closely, Sizzix Framelits Die Set 15PK - Card, Cute as a Bug Step-Ups (660717)

1. Use main Step-Ups die to cut card base from black cardstock; fold as indicated.

2. Use decorative panel dies to cut plaid sheet from 8x8 Mini Paper Stash Halloween. Adhere to card as shown. Die cut stars strip from antique silver Deco Sheets. Adhere on sides as shown. (If you don't have the die set I used, you could cut other shapes, or even punch a design for the sides.)

3. Stamp Dog Lover (Dreamerland Crafts) on watercolor paper in Nocturne ink using a Stamp Platform. I used half of a 5x7 sheet of hot press watercolor paper since I will be fussy cutting the image.


4. Watercolor image with M. Graham watercolors (or other brand). M. Graham watercolors are professional watercolors, wet easily, and are lightfast. I love using them. In case you missed the post intro, I am doing a watercolor series on my YouTube channel and hope, at some point, to feature the techniques I used to paint this image.

5. Fussy cut image with detail scissors. Hint: move the paper while cutting to make it easier to get into small places and turn corners. Use a black brush tip Copic Multiliner SP (the SP versions are refillable, a better value in the long run plus they don't just go in some landfill) to go around the image from the back side. This hides the white on the sides and gives it a polished look. Adhere to card as shown using dimensional/mounting tape.

6. Using a Stamp Platform, stamp Happy Birthday sentiment (Miscellaneous 02, Dreamerland Crafts) on black cardstock using VersaMark ink. Emboss with Adirondack Clay embossing powder (retired, try Ranger Brick). Trim to a strip and add tails on either end (I cut off the cardstock 1/2 inch from each side of the sentiment, then added tails). Adhere to card as shown using dimensional/mounting tape. Hint: use a black alcohol marker, such as a Sharpie, to go around edges of tape before sticking to image - this will hide any white that may show.

7. Optional: from white or ivory cardstock, die cut another panel from the Step-Ups set. Adhere to back of card for a place to write (you could also put one inside the card).


Supplies
Follow my blog with Bloglovin so you won't miss any of the doggie fun!

Wednesday, April 11, 2018

Beach Birthday Card with Xyron & Paper House


This project is a collaboration between Xyron and Paper House. The Xyron Design Team members were each sent a pad of 12x12 paper (including stickers!) plus a couple rolls of washi tape from Paper House. I chose the Sun Drenched pad because it is so colorful, and I'm dreaming of summer (hoping for warm weather soon)!

When I saw the pad of paper, I had the perfect dies in mind: Karen Burniston recently released the Palm Tree Pop-up as well as some other ocean themed dies. I love how fun this card is!

Xyron & Paper House Birthday Card, Karen Burniston Palm Tree Pop-up

Affiliate links may be included in this post. I participate in the Amazon Services LLC Associates Program, Share a Sale, and other affiliate programs; these affiliate advertising programs provide a means for me to earn fees by linking to amazon.com and/or other affiliated sites at no cost to you. This helps offset a small portion of my crafting addiction... uh, hobby. I am truly thankful for your kind support! I also receive free products from my design team companies. Regardless, all opinions are my own. I do not get paid for my posts unless otherwise specified. Cookies may be used on this site. See notice at bottom of blog for a longer description.

Making the Card

1. Cut dark brown cardstock 7 x 10 inches; fold in half to form a 5 x 7 inch top folding card. Cut black cardstock 4 1/2 x 6 1/2 inches. Cut 2 3/4 inches off bottom of sunset patterned paper (Sun Drenched, Paper House) then cut 4 1/4 x 6 1/4 inches horizontally from left bottom corner.

2. To create palm tree/hill silhouette, die cut black cardstock with palm tree hill top die (Tropical Scene dies) with about 3/4" from the bottom, on the left (i.e. enough to cover the island printed on the patterned paper). Extend the cut with the hills die without trees (hint: I used a black fine tipped Sharpie to mark where the blade is located to make it easier to line up). Use scissors if it doesn't cut perfectly. From black cardstock, also cut the tops of 3 palm trees. Trim middle section in a V to make birds; trim one smaller by cutting off part of the "wings."


3. Die cut Happy Birthday from white glitter cardstock. Carefully cut words apart following the curve of the letters.


4. Put all pieces (but not card base!) into Creative Station with permanent adhesive. Rub around all pieces before pulling off cellophane - I recommend cutting the pieces apart first. When removing, pull the backing sheet away from cardstock/paper to keep them from bending. Adhere black cardstock to card base, then sunset patterned paper, then black silhouette hill and palm trees (over the one pictured on the sunset paper). Add a strip of shell washi tape to the bottom as shown. Optional: add stickers shells (Sun Drenched, Paper House) where shown.


Cut pieces apart; pull backing away from cardstock/paper to avoid bending
5. Put birds into 1.5" Create-a-Sticker; rub around edges of birds. Color "Happy" and "Birthday" with alcohol markers (see Supplies for a list of markers I used). Gently blend with colorless blender (note: if you rub too much, the alcohol may dissolve the glue, depending on the glitter cardstock used). Adhere "Happy" to card where shown (save "Birthday" for inside of card). Adhere birds to card where shown (see final image).


6. For the inside of the card, first cut the pieces of paper to line the inside. Reinforce the paper by lining it with black cardstock such that the black will form a border around the card, excluding the inside fold area. To do this, find the sand image paper (Sun Drenched, Paper House) with the wave/sea foam at the top. Trim the right side of the piece 6 1/2 inches from the right edge. Trim up from the bottom (i.e. the side without wave) 4 3/4 inches. Repeat from the bottom of the larger piece 4 3/4 inches, trimming off most of the wave. You should have two pieces 4 3/4 x 6 1/2 inches. Cut two pieces of black cardstock 6 3/4 x 4 7/8 inches (hint: if you have a piece of 8 1/2 x 11 inch cardstock, first cut 6 3/4 inches down the length of the paper - so you have a long piece - then cut two pieces from that at 4 7/8 inches each). Put the sand pieces (not the black) through the Xyron Creative Station with permanent adhesive. Attach each to a piece of black cardstock such that the long edge matches up with one of the long sides on the black - this will eventually be towards the fold; for the piece with the wave on the corner, match the opposite side to the black edge. See photo below - the edge towards the fold is flush with the black (sorry it is difficult to see - there is no black between the fold and the sand edge). Important: do not run black pieces through Xyron or attach to card yet! Trim a very small amount (< 1/16 inch) from the edges without the borders in order to accommodate the fold.

Adhere sand pieces to black but do not adhere the black yet; they will first be placed only temporarily inside the card.
7. Find the paper with the water and yellow-green sky (Sun Drenched, Paper House). Cut 6 1/2 inches from the right side. Use wave die (Tropical Scene) to cut across the light wave area (I angled the die to match the light area) - the stitched line will be towards the bottom of the page. You will need to extend the cut like you did with the palm tree hill by marking the die (black fine tipped Sharpie) and continuing to cut along the light area (use scissors if it doesn't cut perfectly). Once you have the wave piece, cut off about 2 1/2 inches from the bottom on the right side, leaving 1 1/2 or so inches measuring from the bottom to the wave on the right side; set aside for a moment. Next, cut about 3 inches off the leftover sand piece (by about 5 1/2 inches wide). Cut black cardstock the same size or a little larger. Put the wave and the sand into the Xyron Creative Station. Adhere the sand to black cardstock (you will cut the palm tree bases from this); adhere the wave to the bottom of the piece from step 6, covering the printed wave, so it lines up with the the edges.

Wave piece going into Xyron. Sand piece adhered to black cardstock; palm tree base die pictured, ready to die cut
8. Watch the following assembly video but don't assemble yet. Cut the pieces as described below the video then watch it again while you assemble. Use the Xyron Mega Runner to secure the die cut sand/black border pieces in the card as shown in video; use the Xyron 1.5" Create-a-Sticker for adhesive on coconuts and turtle shell pieces.


Using the Palm Tree Pop-up and Sea Animals dies, die cut the following then shade (described in steps below):
  • Light brown cardstock: cut 2 sets of pop up tree trunks, 2 smaller tree trunks, 1 turtle shell
  • Dark brown cardstock: cut 3 sets of coconuts (9 total), 1 turtle shell detail
  • Green cardstock: 2 sets of large tree tops, 2 small tree tops, 1 turtle
  • Salmon cardstock: 1 crab
  • Black cardstock: 1 oval piece for behind crab's eyes
  • Sand with black cardstock backing (from step 7): 2 tree bases (strips with 4 holes)


Use blending tool and Walnut Stain Distress Ink to shade and stencil (using dies) palm tree trunks. Use Twisted Citron Distress Oxide ink to add highlights to palm tree fronds. Note: Use the Xyron Adhesive Eraser on any extra adhesive, such as removable tape residue used to hold the pieces in place or any stuck around the edges of cardstock or paper.

Xyron & Paper House Birthday Card, Karen Burniston Palm Tree Pop-up

9. Once you have assembled the card as described in the video (minus hammock), add the extra tree as shown. Adhere coconuts as you like. Glue black oval behind crab's eyes and use Black Copic Multiliner .5 to draw through crab die as a stencil for the mouth. Add shading with Barn Door Distress Ink (I applied it with a blending tool). Adhere where shown.

10. Use Bundled Sage Distress Ink to shade turtle body and Walnut Stain to shade main turtle shell. Use Black Copic Multiliner .5 to draw through turtle body die for eyes. Assemble turtle and adhere where shown. Adhere "WARM" "Birthday" and "WISHES" where shown, using stickers from Sun Drenched, Paper House for "WARM" and "WISHES".

Xyron & Paper House Birthday Card, Karen Burniston Palm Tree Pop-up

Supplies
Follow my blog with Bloglovin so you won't miss any of the beachy fun!


SaveSave