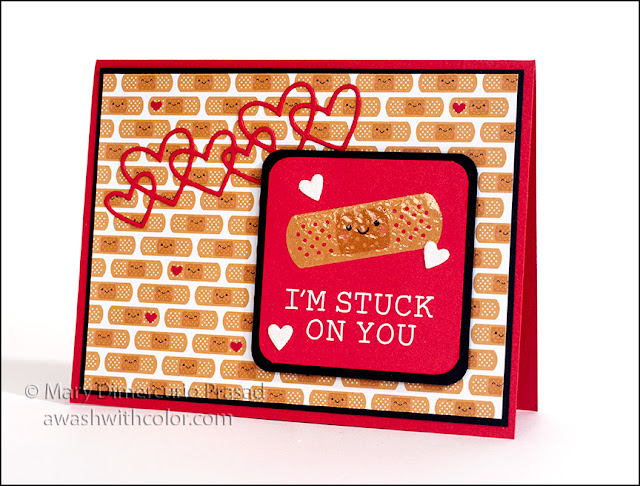
Here's another fairly quick card using Doodlebug Design papers. So Much Pun is part of their "punny" collection, along with So Punny. They have a page or two in each pack that can be cut apart for easy additions to cards. I made this particular card for my husband. I just love how cute and colorful Doodlebug Design products are!
Making the Card
1. Cut red cardstock 5 1/2 x 8 1/2 inches; fold in half to form a 4 1/4 x 5 1/2 inch card base. Cut black cardstock 4 x 5 1/4 inches for mat; set aside. In the So Much Pun 6x6 paper pad, find the page with the smiling bandages. Cut to 3 7/8 inches tall first, watching orientation of bandages (i.e. cut off top or bottom). Next cut to 5 1/8 wide, keeping the leftover strip of bandages for the inside of the card. Adhere to black mat then adhere to card base.
2. From red cardstock, die cut Linked Hearts. Adhere where shown on card base. You may want to wait until you do step 3 before placing and gluing hearts. Note: the hearts I used have been discontinued but I put an alternative in the Supplies list; you may have to change the orientation of these hearts and the pun in step 3.
3. In the So Much Pun 12x12 Paper Pack, find the sheet of square puns and cut out the "I'm stuck on you" pun. Cut black cardstock slightly larger (I just put the pun in a corner of the cardstock, with the amount of space I wanted on the cut sides, then put pencil marks on the other sides to match, and cut). Use the Crop-A-Dile Corner Chomper Tool to round the corners 1/4 inch on both the pun and the black cardstock; adhere together. Adhere to card base as shown using dimensional tape.
4. Optional, use Wink of Stella on main bandage. Once dry, add Glossy Accents over same bandage.
5. From white glitter cardstock, die cut triple hearts using Coffee Charms die. Adhere where shown.
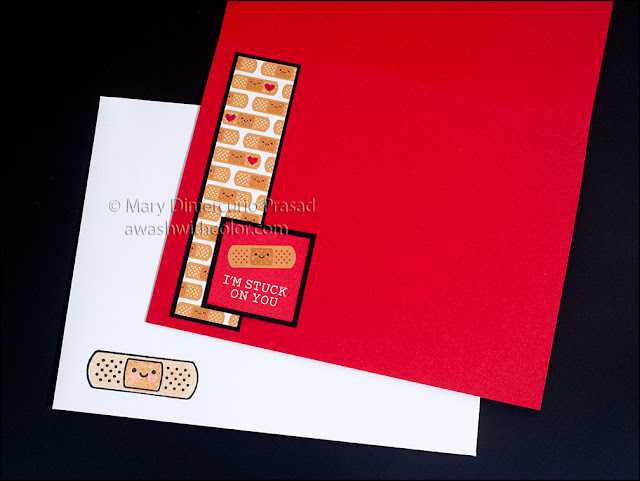
6. Cut red paper with Envelope Liner die for A2 card (sorry, inside liner is not shown). Set aside small red hearts. Make an A2 envelope from white paper using Envelope Board - leave unassembled (assembly in step 7). Stamp bandage and face on front bottom left corner with Memento Tuxedo Black ink (may want to fold envelope temporarily to note where to stamp but lay it all flat again for stamping). Color image with colored pencils.
7. Adhere liner to inside envelope then assemble envelope. Use a bone folder to help with folds.
8. For the inside of the card (image further below), cut a black mat slightly larger than the saved strip of bandages. Adhere together than to inside of card where shown. In the So Much Pun 6x6 Paper Pack, find the sheet of square puns (matching the 12x12 for the front of the card) and cut out the "I'm stuck on you" pun. Cut black cardstock slightly larger; adhere together then adhere inside of card where shown.
9. To add a little more detail to the small bandages on both the front of the card and on the inside strip, glue small red hearts (saved from step 6) as shown. You may have to look closely to see them. Your pattern may vary somewhat depending on how the pattern was printed and cut on your particular sheet. I recommend placing all hearts first then gluing then down once you like the placement. I put 5 on the front and 3 inside the card.
Supplies
- Cardstock: Red, Black, White Glitter
- Paper: Red, White
- Doodlebug Design: So Much Pun 6x6 Paper Pad (6072), So Much Pun 12x12 Paper Pack
- Karen Burniston in Cahoots with Riley and Company Coffee Charms (1041)
- Paper Smooches Linked Hearts (A2D254) Alternative: Penny Black Line of Hearts
- We R Memory Keepers Envelope Board
- We R Memory Keepers Crop-A-Dile Corner Chomper Tool 1/2"/1/4"
- Sizzix Framelits Envelope Liners, A2 &A7 (662792)
- Doodlebug Design Stamps: Pill Better (6337)
- Doodlebug Design Washi: Stuck on You
- Memento Ink: Tuxedo Black
- Prismacolor Colored Pencils
- Optional: Wink of Stella, Glossy Accents
- Dimensional Tape


