Showing posts with label Karen Burniston. Show all posts

Monday, June 24, 2024

Halloween Lilly Accordion Rectangle Card

Made for the ECD Susan Tierney-Cockburn Design Team

I just love Graphic 45 papers, especially the Halloween pads! It was so much fun using the coordinating 6x6 and 8x8 Rare Oddities papers - the colors and designs, oh my! For the front of my card, I created a lily in purple and black (based on the Landini Lily images I found online) using Susan Tierney-Cockburn's beautiful Lily dies; prefect for my Halloween theme.

Copyright Notice: ©Mary Dimercurio Prasad. All rights reserved. Any illegal reproduction of this content, including images, will result in immediate legal action.

Disclaimer:  Please help support my work in this small way - just use my links if you plan to purchase anything - there's no extra cost to you. Here's the official jargon: links, affiliate links, and cookies may be used in this post and on this site. Using this site implies your consent. I participate in the Amazon Services LLC Associates Program, Share a Sale, and other affiliate programs; these affiliate advertising programs provide a means for me to earn fees by linking to amazon.com and/or other affiliated sites. This helps offset a small portion of my crafting addiction... uh, hobby. I am truly thankful for your kind support! I also receive free products from companies, possibly monetary compensation, and sometimes free products for review. Regardless, all opinions are my own. Google and Blogger use cookies to provide and improve their services. See Notice at the bottom of this blog for a longer description and/or see the full Privacy Policy
 for even more details.

Making the Card

Note: basic color and word sheets come from 6x6 Graphic 45 - Rare Oddities pad, other decorative papers (books, butterflies, etc.) from the 8x8 pad.

1. From black cardstock, die cut three copies of the main Accordion Rectangle as the card base. Also cut green newspaper print/cream background paper using main Accordion Rectangle. Adhere it to one of the black card bases then cut the connecting tabs and flap off (see instructions in packaging); this will be the last panel of the card. For the first panel, which will be the front of the card, using the decorator die (largest rectangle die), cut the purple with cream words paper from 6x6. Adhere to center (flap to right).

2. Cut leaves and stem of Garden Notes - Lily from green page. Using applicator, shade with green Pan Pastel (I folded the leaves backwards down the middle to chalk the center line). Optional: you may use Distress Ink as shown in the video - Peeled Paint should work. Cut petals and stamen from purple page. Using blending tool to add Dusty Concord Distress Ink covering the side with words and as shading to purple side of petals and stamen. Add Black Soot Distress Ink to top and bottom of both sides of each petal as well as stamen. With a watercolor brush, brush some Black Soot in stripes down the middle of each petal (I used the originally purple side of the paper as the fronts for the stripes, which will form the inside of the petals). Shape flower and assemble as instructed in video below. Note: I used black embossing powder as pollen on the ends of the stamen.

3. Using Katie Flourish Frame Edges, cut 4 long edges and 4 short from purple paper, 2 long edges and 2 short from both orange and green. Adhere purple forming frames on both sides of first panel (step 1). Adhere orange to middle (flap right) and green to last (no flap).

4. Tie two pieces of twine together into a bow. Optional: the white was too bright against the cream in the card so I used Antique Linen Distress Stain and water to antique it. Cut cream tag using small tag on the main Tags Pivot Card; trim to a single tag (note: I used a scrap just larger than the last tag). Stamp October word background with Concord Grape Distress Ink 2nd generation stamping, i.e. stamp first on a scrap then on the tag. I used Cherish the Day CTMH stamp set, but it might be difficult to find; you may substitute it with any Halloween related word stamps. Using blending tool, add some of the same ink to edges. Sand to give it a grunge look, concentrating a bit more where the "Happy Halloween" will go. Stamp "Happy Halloween" in black near bottom of tag. Adhere flower and leaves to front panel as shown - I cut the stem and pieced it so it would go in the direction I needed to put the flower in the corner and have the stem behind the tag. Adhere tag using dimensional tape. Adhere bow as shown.


5. Cut raven, cat, tree, and bats from black cardstock. Add eyes to cat with yellow or green Milky pen (or paint with acrylic). Use cream Pan Pastels to add highlights to backs of raven and cat. Also add some to the tree. Add a dot of black Enamel Accents for raven's eye. Cut pumpkins from orange paper (I also cut stem area from green, trimmed excess, then glued on pumpkins). Use paintbrush to add lines with Rusty Hinge Distress Ink. Trace pumpkins on yellow cardstock. Cut just inside the lines; glue behind pumpkins to make eyes "glow."

6. Cut pieces of 8x8 patterned papers shown on middle card - books, butterfly strip, "Bewitched" strip, and bottle label. To make the pieces fit perfectly, use the main Accordion Rectangle die to cut them: first rough cut each piece larger than where it will be placed, then looking through die, tape with Post-It or other removable tape before cutting. Adhere where shown (I glued in this order, books, bottle label - not overlapped, butterfly strip, "Bewitched" strip. Mask butterfly strip and above then stamp spider in black where shown (I found the spider stamp in the dollar bin at my local craft store - if you can't find one on a web strand, just stamp a small spider and draw a line down using a black pen). Adhere cat and raven as shown.

7. For the last panel, temporarily place tree and trim branches as desired - if any stick off the left side, cut them off (I did this after gluing). Adhere tree but don't put glue where large pumpkin will be placed; adhere pumpkin slightly under tree. Adhere small pumpkin with dimensional tape. Adhere bats where shown. For a little dimension, I bent a couple bat wings up (you could do a double layer of bats with top set of wings bent up if desired). Adhere enamel dots where shown. Assemble card as per instructions on packaging.


Supplies

Elizabeth Craft Designs
  • 972 Accordion Rectangle (updated to Karen Burniston's new versions)
  • 995 Garden Notes - Lily
  • 989 CountryScapes - Country Critters 1 (Raven, Cat)
  • 1078 CountryScapes - Backyard 3 Apple Orchard (Tree)
  • 1080 CountryScapes - Build a Scarecrow (Pumpkins)
  • 1082 CountryScapes - Critters 4 (Bats)
  • 973 Tags Pivot Card (updated to Karen Burniston's new versions)
  • 977 Katie Flourish Frame Edges
  • 808 Susan's Garden 4pcs. All metal Tool Set in Luxury Case
  • 810 Large Molding Pad
  • Pan Pastels: Susan's Garden PanPastel Flower Coloring Kit 3 - 30117 (Green, Cream)
  • Double Sided Adhesive
Other Supplies
  • Cardstock: Black, Cream, Yellow
  • Graphic 45 Paper: Rare Oddities 6x6 and 8x8 Pads
  • Distress Inks: Dusty Concord, Black Soot, Rusty Hinge
  • Embossing Powder: black
  • Optional: Antique Linen Distress Stain
  • Twine: White/Light Purple/Dark Purple (Tricolor)
  • Happy Halloween Stamp
  • CTMH Stamps: Cherish the Day #S1111 (Stamp of the Month November 2011), Just to Say from Artfully Sent Cricut Collection #D1629
  • Milky: Yellow or Green OR Acrylic Paint
  • Enamel Accents: Black
  • Spider Stamp
  • Dimensional Tape
Follow my blog with Bloglovin so you won't miss any of the fun!

Bunny Easter Card with Xyron Adhesive and Doodlebug


This is my first post for the Xyron Design Team! I love Xyron adhesives (and lamination!). I have a 9 inch Creative Station that also accepts 5 inch cartridges. I have an old 9 inch Xyron as well - still in working condition - my husband uses it a lot to make player aids and other stuff for board gaming. The new design is much more compact - great for a craft room!

I like to add permanent adhesive to cardstock and paper before die cutting, or add it to die cuts that I cut using my electronic cutters (Silhouette Cameo, Cricut Maker). Instant stickers! This makes it easier to assemble, especially when there are lots of pieces.

The theme for this card is Spring/Easter. I chose to use Doodlebug Design Bunnyville paper (6x6 pad). This formed the color palette for my card. I used Karen Burniston's Twist Panel Pop-up dies for the inside of the card - a fun surprise when opened!


Copyright Notice: ©Mary Dimercurio Prasad. All rights reserved. Any illegal reproduction of this content, including images, will result in immediate legal action.

Disclaimer:  Please help support my work in this small way - just use my links if you plan to purchase anything - there's no extra cost to you. Here's the official jargon: links, affiliate links, and cookies may be used in this post and on this site. Using this site implies your consent. I participate in the Amazon Services LLC Associates Program, Share a Sale, and other affiliate programs; these affiliate advertising programs provide a means for me to earn fees by linking to amazon.com and/or other affiliated sites. This helps offset a small portion of my crafting addiction... uh, hobby. I am truly thankful for your kind support! I also receive free products from companies, possibly monetary compensation, and sometimes free products for review. Regardless, all opinions are my own. Google and Blogger use cookies to provide and improve their services. See Notice at the bottom of this blog for a longer description and/or see the full Privacy Policy
 for even more details.

Making the Card

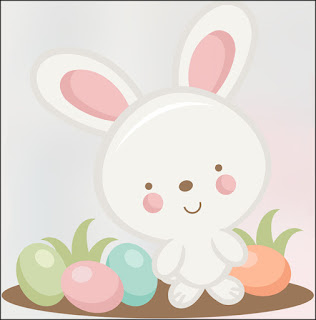
1. I looked through my library of SVG files to find a bunny that closely matched the one in the Doodlebug Design Bunnyville paper pad. I chose to use the Easter Bunny from Miss Kate Cutables. I didn't want the cheeks, mouth, or shading though. I also wanted to add a bow and outfit to more closely resemble one of the bunnies in the paper pad designs. I used the "easter bunny-apart" SVG file and cut it with my Silhouette Cameo.

Used the Silhouette software to edit the file. First resize the image (I think I used 3 inches in height - just use the grid to measure one of the bunnies as you drag one corner until you have the size you want), then ungroup the image to separate the images. I deleted all images I didn't want (i.e. remove all but the simple eggs and delete bunnies 3, 4, and 5 counting from the left). Note: in my screen shot further below, you will see an extra white bunny layer, without a face but with ears cut out, on the right - I didn't end up using it; my original intention was to use it for filling in the eyes and nose but the pink bunny layer worked well enough for this, as you will see. Just cut the white bunny (ears filled in) on the right with pink cardstock (you can change the fill to pink if you like).

To edit the points, first select the layer to edit then click the tool below the move tool - if you hover over it, it says "Edit Points." Now you can click on points and drag to move, remove them (delete), or change the curves (by moving attached handles). I deleted all points for mouth and cheeks. Holding the control key while clicking brings up a menu (I used a Mac; this is the same as a right click). In hindsight, I wish I had made the eye holes bigger and moved the face further down. The eyes are not as big as they look in the original image above. Note: the colors do not matter - the cardstock that you cut does. I changed the fill (color) to match what I wanted in the final cuts. Again, you really only need three bunnies, the one with the face, the outline, and the white one (which I made pink).


Optional: to make a girl bunny, I found a file with a bow and edited/resized it. If you don't have one, just skip this and make a boy bunny with blue clothes. My file before cutting looks like the one below (you may want to save the file before proceeding to cut).


2. On your Silhouette cutting mat, arrange the cardstock and patterned papers. I cut each piece a little bigger than necessary to give me some wiggle room. Place each piece on the physical mat to match its corresponding image placement on the software mat grid. For example, the grass is between 4 and 5 1/2 inches vertically and between 0 and 3 inches horizontally. I added green patterned paper in this area. Your cursor should have lines going in each direction so you can read the positions on the rulers easily.

Cardstock and Papers Used
  • White bunny: white cardstock
  • Gray outline: light gray cardstock
  • Pink bunny: pink cardstock
  • Grass and ground: Gingham-Linen Rainbow Petite Prints
  • Blue and orange eggs: Gingham-Linen Rainbow Petite Prints
  • Yellow and pink eggs: Dot-grid-daisy-stripe Rainbow Petite Prints
  • Girl bunny clothes: Dot-grid-daisy-stripe Rainbow Petite Prints
Silhouette mat with cardstock and patterned paper (don't need right white piece)

After cutting and removing most of the scrap parts

3. After cutting all the pieces, run them through the Xyron 9" Creative Station with Permanent Adhesive (you could use a 5" cartridge instead). If I have a lot of pieces, even small ones, I put them through my larger machine - I just use something like a bone folder to scoot them in so they touch the adhesive area before rolling them through. Alternatively, you may use the Xyron 1.5" Sticker Maker for small items.

Put pieces into Xyron 9" Creative Station

Use a bone folder or other tool to push small pieces further in

Die cuts after going through Xyron Creative Station plus Xyron Sticker Maker with blue egg

4. To make the card base, cut yellow cardstock 4 1/4 x 11 inches; fold in half to form a 4 1/4 x 5 1/2 inch top folding card base. Cut light blue cardstock 3 3/4 x 5 inches. Cut bunny/chick/sun patterned paper from Bunnyville 6x6 pad to 3 1/2 x 4 3/4 inches; adhere to light blue using Xyron Mega Runner. Adhere to front of card with Mega Runner.


5. Using rectangle die from Twist Panel Pop-up, die cut light blue cardstock; adhere to card front near center bottom as shown. Assemble Easter Bunny as follows:

Cut the body off the pink bunny at the chin, rounding from one side to the other with the shape of the head. You will use the body for the bunny clothes. On the white bunny, line up the light gray outline at the ears - only stick down the ears, leave the rest up. Line up the pink body with the feet and arms but do not press down. Gently put the gray outline over this and trace inside arms and legs (try not to get any pencil on the gray outline).

Pencil in lines as guides for cutting clothes

Remove the pink body and trim inside the lines to make clothes that fit over the bunny's belly. Check your cutting and retrim if necessary.

Trimmed down pink clothes

Line up ears of white bunny on pink head but do not press down yet. Use a pencil to lightly mark the eye locations (I marked it darker in the photo so it would show up). Use a brown alcohol marker (I used First Edition Graphic Markers 51 Chestnut; you could use Copic Sepia E37) to color where eyes will be. Be careful not to get any in the nose area. Adhere white layer over pink. Adhere bow where shown if desired.

Add brown marker behind eye area

Optional: once I had a template, I used it to cut the pink flowered pattern from Dot-grid-daisy-stripe Rainbow Petite Prints - you could leave it pink cardstock or trace it on blue if you want to make a boy bunny. Stick down the clothes then the outline.

Use template to cut flower pattern paper

Bunny with new clothes

6. Adhere grass ground (long oval) at bottom of blue frame on card front. Adhere grass where shown, then eggs and finally bunny.


7. Cut out "hippity, hoppity, Easter's on it's way!" label from Bunnyville 6x6 pad. Trim sides so dots are about 1/8 inch all the way around. Use 1/4 inch Corner Chomper to round the corners. Use foam tape to pop up label on card; see video below.


8. Create the inside card using Twist Panel Pop-up dies. Cut light blue cardstock 3 3/4 x 11 inches; fold in half. This will be the inside liner on which the pop-up mechanism (die cut) will go. Watch the video below before assembling. The cardstock and papers I used are listed below the video.


Pop-up arms: light blue cardstock
Pop-up panels: yellow cardstock
Panels are all decorated with patterned paper from Bunnyville
1st Panel: sunshine paper cut with rectangle die, square house scene with 1/4 inch rounded corners
2nd Panel: Easter words cut with rectangle die
3rd Panel: animal stack with 1/2 inch rounded corners
4th Panel: jelly beans cut with rectangle die, square "Happy Easter" (trim excess)
Top decoration: bunny family with 1/2 inch rounded corners
Banner flags: triangle - flower, chick, girl bunny; fishtail - boy bunny, flowers, sunshines

I used my Mega Runner for most of the adhesive and liquid glue for the rest (e.g. to glue twine behind panels). To sting the banners, cut a small slit in the middle of the curves, top left 1st panel, top right 2nd panel, top left 3rd panel, top right 4th panel. String the banner flags along the pink/white twine before securing. Once you are happy with how it is strung, glue twine from behind and trim of any excess.


Supplies
Follow my blog with Bloglovin so you won't miss any of the bunny fun!
SaveSave

Wednesday, October 21, 2020

Doodlebug Design Quick Card - Stuck on You

Doodlebug Design Quick Card - Stuck on You

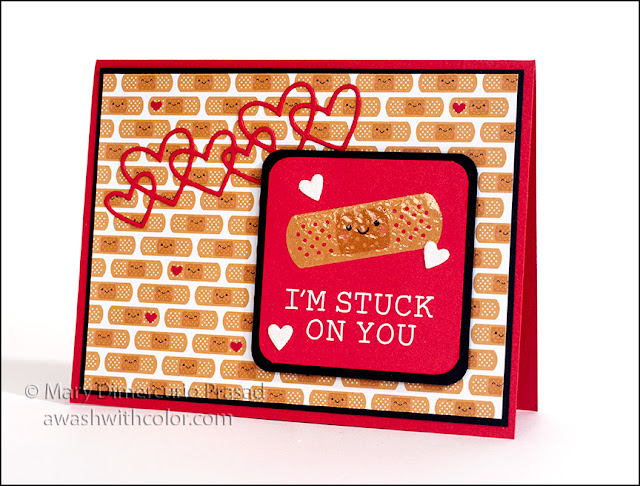
Here's another fairly quick card using Doodlebug Design papers. So Much Pun is part of their "punny" collection, along with So Punny. They have a page or two in each pack that can be cut apart for easy additions to cards. I made this particular card for my husband. I just love how cute and colorful Doodlebug Design products are!

Copyright Notice: ©Mary Dimercurio Prasad. All rights reserved. Any illegal reproduction of this content, including images, will result in immediate legal action.

Disclaimer:  Please help support my work in this small way - just use my links if you plan to purchase anything - there's no extra cost to you. Here's the official jargon: links, affiliate links, and cookies may be used in this post and on this site. Using this site implies your consent. I participate in the Amazon Services LLC Associates Program, Share a Sale, and other affiliate programs; these affiliate advertising programs provide a means for me to earn fees by linking to amazon.com and/or other affiliated sites. This helps offset a small portion of my crafting addiction... uh, hobby. I am truly thankful for your kind support! I also receive free products from companies, possibly monetary compensation, and sometimes free products for review. Regardless, all opinions are my own. Google and Blogger use cookies to provide and improve their services. See Notice at the bottom of this blog for a longer description and/or see the full Privacy Policy for even more details.

Making the Card

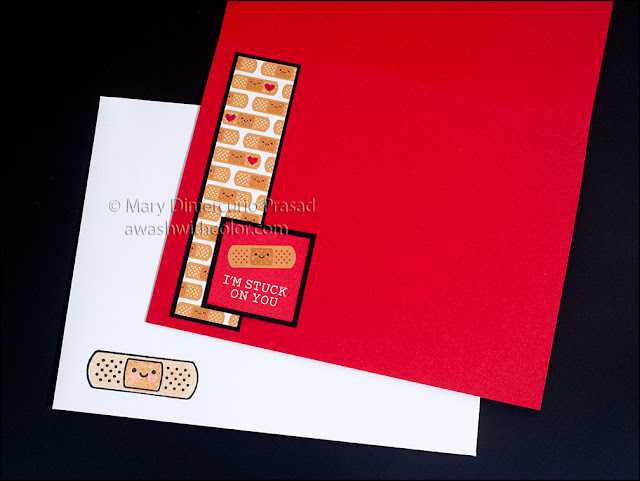
1. Cut red cardstock 5 1/2 x 8 1/2 inches; fold in half to form a 4 1/4 x 5 1/2 inch card base. Cut black cardstock 4 x 5 1/4 inches for mat; set aside. In the So Much Pun 6x6 paper pad, find the page with the smiling bandages.  Cut to 3 7/8 inches tall first, watching orientation of bandages (i.e. cut off top or bottom). Next cut to 5 1/8 wide, keeping the leftover strip of bandages for the inside of the card. Adhere to black mat then adhere to card base.

2. From red cardstock, die cut Linked Hearts. Adhere where shown on card base. You may want to wait until you do step 3 before placing and gluing hearts. Note: the hearts I used have been discontinued but I put an alternative in the Supplies list; you may have to change the orientation of these hearts and the pun in step 3.

Doodlebug Design Quick Card - Stuck on You

3. In the So Much Pun 12x12 Paper Pack, find the sheet of square puns and cut out the "I'm stuck on you" pun. Cut black cardstock slightly larger (I just put the pun in a corner of the cardstock, with the amount of space I wanted on the cut sides, then put pencil marks on the other sides to match, and cut). Use the Crop-A-Dile Corner Chomper Tool to round the corners 1/4 inch on both the pun and the black cardstock; adhere together. Adhere to card base as shown using dimensional tape.

4. Optional, use Wink of Stella on main bandage. Once dry, add Glossy Accents over same bandage.

5. From white glitter cardstock, die cut triple hearts using Coffee Charms die. Adhere where shown.

6. Cut red paper with Envelope Liner die for A2 card (sorry, inside liner is not shown). Set aside small red hearts. Make an A2 envelope from white paper using Envelope Board - leave unassembled (assembly in step 7). Stamp bandage and face on front bottom left corner with Memento Tuxedo Black ink (may want to fold envelope temporarily to note where to stamp but lay it all flat again for stamping). Color image with colored pencils.

Doodlebug Design Quick Card - Stuck on You

7. Adhere liner to inside envelope then assemble envelope. Use a bone folder to help with folds.

8. For the inside of the card (image further below), cut a black mat slightly larger than the saved strip of bandages. Adhere together than to inside of card where shown. In the So Much Pun 6x6 Paper Pack, find the sheet of square puns (matching the 12x12 for the front of the card) and cut out the "I'm stuck on you" pun. Cut black cardstock slightly larger; adhere together then adhere inside of card where shown.

9. To add a little more detail to the small bandages on both the front of the card and on the inside strip, glue small red hearts (saved from step 6) as shown. You may have to look closely to see them. Your pattern may vary somewhat depending on how the pattern was printed and cut on your particular sheet. I recommend placing all hearts first then gluing then down once you like the placement. I put 5 on the front and 3 inside the card.

Monday, May 20, 2019

Spring Greeting Card with Sennelier Watercolor


This sweet image by Dreamerland Crafts is a perfect Spring or Summer greeting card, with it's soft colors - complete with blue sky and fluffy white clouds. Sennelier L'aquarelle watercolor was used to paint the image. They are a dream to work with: easy to re-wet and so very pigmented. These paints are very high quality, with excellent lightfast ratings. Doodlebug Design papers, Karen Burniston die cuts, and some customized flowers add to this fairly simple card design.

Disclaimer: Please help support my work in this small way - just use my links if you plan to purchase anything - there's no extra cost to you. Here's the official jargon: links, affiliate links, and cookies may be used in this post and on this site. Using this site implies your consent. I participate in the Amazon Services LLC Associates Program, Share a Sale, and other affiliate programs; these affiliate advertising programs provide a means for me to earn fees by linking to amazon.com and/or other affiliated sites. This helps offset a small portion of my crafting addiction... uh, hobby. I am truly thankful for your kind support! I also receive free products from my design team companies, possibly monetary compensation, and sometimes free products for review. Regardless, all opinions are my own. Google and Blogger use cookies to provide and improve their services. See Notice at bottom of blog for a longer description and/or see the full Privacy Policy for even more details.

Making the Card

1. Cut a piece of Fabriano Artistico Extra White Hot Pressed watercolor paper to 4 1/4 x 6 inches or larger (I left extra wiggle room around my stamping).

Notes about the paper: I did not like how the paint stuck to some spots on the paper more than others when I used a wet-in-wet wash (sky); I would probably use a different brand for this type of work next time. If you look closely, you can see that the paint stuck to some fibers more than others, giving it a grainy texture - of course this is fine if you are going for that look. I didn't care for it. However, I do like the extra white color of the paper, as well as the smooth texture that makes stamping much easier than on textured watercolor paper.

2. Using a Stamp Platform and Nocturne VersaFine Clair ink, stamp Pleasant Fragrance (Dreamerland Crafts stamp) on the paper cut in step 1. You will need to trim the bunny stamp area from the girl stamp unless you want to mask or do selective inking.

3. Use Sennelier (or other) watercolors to color image. To create the sky, I used a wet-in-wet wash of blue, going from dark at the top, fading to nothing near the ground line. Then, while still wet, I used a tissue to blot areas for clouds, removing the blue so the white of the paper showed. For the grass, I put down a light green wash, then filled in the grass blades using a few different shades of green.

4. Once the image was dry, I used a black Copic Multiliner to fill in areas of grass to give it a more cohesive look with the stamping.


5. Die cut green cardstock with largest Crosshatch die with crosshatching. Die cut image using largest Crosshatch rectangle die without crosshatching. Adhere to green die cut.

6. Die cut 5 or 6 "hello" words from green cardstock using die from Word Set 6 - Summer. Glue these together one by one to form a thick stack.

7. Choose a couple flower embellishments for the bottom left on card. Optional: use the same watercolor as you did on the flowers in the stamped image to color a couple white flower embellishments so they match perfectly.

8. Cut white cardstock 7x10 inches; fold in half to form a 5x7 inch card base. Cut red cardstock 4 3/4 x 6 3/4 inches; adhere to card base.

9. Find the red striped and red polka dot papers from the Doodlebug Design Dot-Grid-Daisy-Stripe Rainbow Petite Prints 6x6 paper pad (note: I couldn't find the papers I used for a link; you may want to try Dot-Stripe instead). Cut two striped and one polka dot piece to 2 x 4 3/8 inches. Adhere to red cardstock as shown. Adhere matted image as shown.

10. Glue on flowers, hello, and enamel dots where shown.


Supplies
Follow my blog with Bloglovin so you won't miss any of the watercolor fun!

Tuesday, September 25, 2018

Smooch Marbleized Papers in a Halloween Pop-up Card


This is a collaboration between Xyron and Clearsnap. Clearsnap sent the Xyron Design Team $25 worth of goodies from their catalog to create with. I already own a bunch of ColorBox pigment ink pads and several ColorBox Petal Point pigment ink pads so I decided to try their Smooch Pearlized Accent Ink - a product I had not used before - in 5 different colors (I also received a Cat's Eye pigment ink pad).

Smooch Pearlized Accent Inks come in a small container with an applicator attached to the lid. It looks similar to a nail polish bottle, except the applicator is not a brush, instead it has a small pointy ended, slightly flexible tip. The ink has a metallic-like shine, perfect for adding accents to projects. It also works well for making marbled papers. There are a lot of videos on YouTube already but it's so easy that you probably don't need a video. I tried colored cardstock but the inks didn't show up well - I recommend using white or cream colored cardstock. I also tried one color and didn't like it. I recommend using 2 or 3 colors for contrast (you can see my failed attempts to the left of the tray in the photo below).

Disclaimer: Please help support my work in this small way - just use my links if you plan to purchase anything - there's no extra cost to you. Here's the official jargon: links, affiliate links, and cookies may be used in this post and on this site. Using this site implies your consent. I participate in the Amazon Services LLC Associates Program, Share a Sale, and other affiliate programs; these affiliate advertising programs provide a means for me to earn fees by linking to amazon.com and/or other affiliated sites. This helps offset a small portion of my crafting addiction... uh, hobby. I am truly thankful for your kind support! I also receive free products from my design team companies, possibly monetary compensation, and sometimes free products for review. Regardless, all opinions are my own. Google and Blogger use cookies to provide and improve their services. See Notice at bottom of blog for a longer description and/or see the full Privacy Policy for even more details.

Making the Card

1. Cut purple cardstock 5 1/2 x 8 1/4 inches; fold in half to form a 4 1/4 x 5 1/2 inch card base.


2. Cut several sheets of white cardstock to about 5x7 inches (I cut mine larger than the card base so I could trim down to the area I liked best). Fill a tray with about 1/2 inch of water; I used the lid from a take-out box. Shake Smooch bottles before using. Tap Dusk around on surface. You may not see it but it will be there. Tap Sugarberry in places. Note: the longer you hold the tip in the water, the more the ink will dispense. Alternate between these colors until the surface is fairly well covered. Tap in alternating rings, one inside another. Once you have the desired coverage (don't overdo it), use a toothpick to gently go through the water in a snaking motion to swirl the colors. Take one of the sheets of cardstock and, starting with one edge, gently but quickly drop the paper onto the surface of the water then pull it back out. Do not touch the paper surface or the ink will smear. Set aside to dry. You may want to do a few practice sheets with scrap cardstock. Empty water, wipe tray with paper towel, then repeat until you have about 3 or 4 good designs. Once dry, cut two sheets to 4 x 5 1/4 inches; set these aside for now.


Next you'll die cut all the pieces for the card. I recommend watching the video now (step 9) so you know how everything goes together before cutting and assembling.

3. Using Frame Pull Pop-up dies, die cut the following from the listed cardstock:

Purple - big smiley square, big solid square, smiley pull tab, small pop up piece, use two small solid squares to make a small frame for inside pop up
Marbled - two big rectangles, big frame; use inside big frame piece to die cut with small solid square in center for inside pop-up

Also hand cut a small white square of cardstock to go behind arrow.


4. See photo below. Cut Happy Halloween oval sentiment with bat (Halloween Charms) from purple cardstock and the bat area from black cardstock. Trim out bat with detail scissors. From the same set, die cut bat charm and spider charm from black cardstock. Add eyes to spider and eyes and mouth to bat with Orchid Frost Smooch ink; add wing lines to bat with Sugarberry Smooch ink (don't use the stencil feature with the die, the ink will likely run under it). Trim charm ring loop from bat. Finally die cut two ghosts from white cardstock. Add eyes and mouth through stencil in die with .25 black Copic Multiliner SP, leaving small triangles of white for highlights (you could also use a white gel pen to add the highlights after coloring). Note: the Copic Multiliner SP versions are refillable so you don't have as much plastic waste going into land fills; you may also change the nibs, although I have yet to do so and have used mine for years. Trim off charm ring loops.


5. From light orange cardstock, die cut pumpkin (Autumn Elements) and Jack-O-Lantern (Halloween Elements) with the face die. From black cardstock also cut a Jack-O-Lantern without the face; you may want to trim it down a little - adhere it behind orange to fill in face. Shade edges and left side using orange ink from Pinwheel Petal Point. I love these inks - the applicator lets you get into small areas. Use the green ink to color the stems. Use Pumpkin Smooch to draw lines on pumpkins as shown; use Green Apple Smooch on the stems to give them a bit of shine. Die cut BOO! from black cardstock (Halloween Elements).

6. Cut leaves (Autumn Elements) from light green cardstock. To shape leaves, rub backs with ball stylus or end of a paintbrush. Draw lines down front centers using a pointy tip, for example, the end of a die pick. Shade with green from Pinwheel Petal Point. Use Green Apple Smooch for veins in leaves.


7. Using Halloween Scene dies, cut 2 webs from white cardstock. Cut graveyard and spooky tree from black cardstock. Use large frame die (Frame Pull Pop-up ) to die cut the graveyard to fit in the bottom of the marbled frame.

8. Using the Xyron 9" Creative Station with permanent adhesive, add adhesive to the 4 x 5 1/4 inch marbled rectangles (set aside in step 2), Happy Halloween oval, two big marbled rectangles (for inside the pop up), spooky tree, graveyard, and purple frame (but not marbled frames). Adhere one 4 x 5 1/4 inch marbled rectangle to front of card base and the other inside card base. Use 1.5 Inch Sticker Maker to add adhesive to Jack-O-Lantern, one spider web, BOO!, and small bat for sentiment. Adhere bat to sentiment as shown in photo 2 above.


9. Watch the following video for assembly. To repeat, I recommend watching the entire video first then watching again while assembling so you have an idea of how it all goes together before doing it. Assemble the frame pull as shown in video but don't adhere to card front yet - use liquid glue to adhere white square behind arrow during assembly. Adhere marbled rectangles inside frame pull. Decorating continues below, including pop up for inside frame.


10. For front of frame pull, adhere large marbled frame leaving top free as shown in video. Adhere graveyard scene (it should fit perfectly inside bottom). Use liquid glue behind the web without adhesive to glue to frame top as shown - from behind, trim off any part that sticks over the top since it will be opening at that hinge.


11. Cut about 3 inches or so of clear thread to hang spider. Feed through spider's charm ring. Add a dab of liquid glue to inside top edge of small marbled frame (the one that will go on the pop up platform with the spider). While holding up thread, place spider inside frame so it is centered then put the two thread ends in glue. Sandwich with purple frame (it should already have Xyron adhesive on it). Trim off thread ends flush with purple frame. Adhere one of the ghosts to frame such that it overlaps the spider's legs - add glue to spider's legs behind ghost to hold in place (if the spider spins, it will probably get crushed when the frame pull card is closed). Adhere spider web to inside frame pull card; adhere frame with spider to pop up platform. Adhere BOO! inside frame pull card as shown.

12. Adhere spooky tree and Jack-O-Lantern where shown on right side of card. Line up frame pull card on front of card then mark arrow location in pencil as shown in video. Use 1" circle punch to cut tabs. Adhere frame pull to card as shown in video (liquid glue should be strong enough - no need for staples). Use liquid glue down back of leaf stem and adhere where shown. Adhere bat, pumpkin, and ghost to front of card using dimensional tape.* Adhere Happy Halloween oval sentiment inside of card.

*To make dimensional tape, run craft foam through Xyron 9" Creative Station with permanent adhesive, peel off clear front sheet, run through again to add adhesive to other side.


Supplies
Follow my blog with Bloglovin so you won't miss any of the marbling fun!

Wednesday, June 20, 2018

Campfire Comfort Tent Pop-up Card & Daniel Smith Watercolor


Another adorable stamp by Dreamerland Crafts, Campfire Comfort is a sweet image of a girl and her pup enjoying a summer evening by their campfire under the stars. I decided to mimic the scene in 3D inside the card using Karen Burniston's new Tent Pop-up dies. To match the stamped image, I altered the tent to have poles (toothpicks), added a blanket and pillow (paper towel) inside the tent, and popped up a campfire. I also mirrored the sky inside the card using the same glitter stars as on the front.

To color the image, I used Daniel Smith watercolors. I absolutely love using them. They are professional watercolors - highly pigmented and lightfast (probably overkill for a card but that's the way I roll!). I enhanced the watercoloring with a touch of colored pencil (Faber-Castell Polychromos).

Disclaimer: Links, affiliate links, and cookies, including those for personalized ads, may be used in this post and on this site. Using this site implies your consent. I participate in the Amazon Services LLC Associates Program, Share a Sale, and other affiliate programs; these affiliate advertising programs provide a means for me to earn fees by linking to amazon.com and/or other affiliated sites at no cost to you. This helps offset a small portion of my crafting addiction... uh, hobby. I am truly thankful for your kind support! I also receive free products from my design team companies, possibly monetary compensation, and sometimes free products for review. Regardless, all opinions are my own. Google and Blogger use cookies to provide and improve their services. See Notice at bottom of blog for a longer description and/or see the full Privacy Policy for even more details.

Making the Card

1. Stamp Campfire Comfort on smooth side of Distress Watercolor Cardstock in Nocturne VersaFine Clair ink (I recommend using a Stamp Platform or Stamp Positioner for this). Also stamp just the tent on reddish brown gingham paper (6x6 Paper Pad Gingham-Linen Rainbow Petite Prints).

2. Use masking fluid (e.g. Molotow 2.0 mm Marker) to add some dot stars in the sky (you will add the smallest ones later with a white gel pen). While drying, fussy cut out gingham tent using detail scissors, or craft knife and cutting mat; carefully cut around pillow/blanket, dog, and girl. Use a Tuxedo Black Memento marker, brush tip side, from the backside to go around the edges - this will help hide any white edges against the black stamping.


3. Watercolor image, leaving tent area alone since it will be covered anyway. Hint: add some Tuxedo Black Memento marker (the fine tip is great for this) around the inside line in case the cutting of the tent piece is a little off. I used Daniel Smith watercolorsBlack Velvet brushes, and a porcelain palette. While the watercolors are out, we'll use them to color the tree stump, two logs, and the ends of toothpicks to form tent poles. Using the Tent Pop-up dies, die cut tree stump (close-up photo further below) and two logs from same watercolor cardstock (the logs go under the fire and are connected, see photo of pop-up fire). Watercolor to look like wood. Cut the sharp ends off two round toothpicks then cut them in half (I used Tim Holtz/Tonic scissors). Watercolor to look like wood to match the tent poles you colored in the front card image.


4. Once dry, rub off the masking fluid from the front card image. You may want to soften the edges a little with a damp brush. Add extra stars, fewer at the bottom graduating to many more at the top. I used a number 10 white Gelly Roll but I had to dot very carefully - a smaller size, like a size 05, might have been a better choice (hindsight!). Adhere the tent cut out (step 2) - I used Lineco Neutral pH Adhesive in a Fineline Applicator. Optional: add some clear Wink of Stella over the fire for subtle shimmer - it doesn't show up in the photos but looks pretty in person. Die cut with 2nd largest Rectangles - Crosshatch die (largest rectangle without crosshatching).

5. Cut dark blue cardstock 7x10 inches; fold in half to form a 5x7 inch card base. Cut linen side of light brown paper (Doodlebug Design 12x12 Paper Pad Gingham-Linen Rainbow Petite Prints) 4 1/2 x 6 1/2 inches, plus two pieces 4 3/4 x 6 3/4 inches (set these aside for now). Adhere the 4 1/2 x 6 1/2 piece to front of card. Use largest Rectangles - Crosshatch die to cut the linen side of dark blue from the same pad. Adhere image to this. Adhere to front of card as shown, leaving equal space around top, bottom, and left side.


6. Die cut the letters H, A, P, P, Y from silver Tim Hotz Kraft Metallic cardstock using Alphabet dies. Adhere to card as shown. Adhere glitter stars as shown. Die cut "sweet" and "summer" (Word Set 6 - Summer) from same silver cardstock. Finally die cut the small lamp (Camping Charms) from bronze cardstock and the small square with rounded corners for the inside of the lamp from yellow-orange cardstock (see close-up photo further below). Adhere the yellow-orange behind the lamp. Optional: use Glossy Accents in openings to look like glass. Set these aside for now, allowing the Glossy Accents to dry.


7. Trim a very small bit off the long side of the two pieces of brown linen set aside in step 5 to accommodate the card fold (i.e. they will be less than 4 3/4 inches x 6 3/4 inches). Adhere to inside of card on either side of fold, minding space around outside edges; you may want to place them without adhesive first to be sure they won't need more trimming.

8. Watch the following video but do not assemble yet. Read the instructions below the video first before assembling the tent.


Using Tent Pop-up campfire dies, die cut fire in yellow cardstock and smaller flames in yellow-orange cardstock. Adhere together, leaving room for logs (line up evenly above yellow-orange). Optional: add some clear Wink of Stella over the fire for subtle shimmer. Adhere logs to bottom (step 3). Die cut tent in reddish brown gingham from Doodlebug Design 12x12 Paper Pad Gingham-Linen Rainbow Petite Prints to match tent on front of card - keep the small circles cut out at the top of the tent. Since I wanted the tent to match the front of the card, I altered it by adding toothpick "poles" and replacing the hole cut outs. Use washi tape in a brown color behind the holes and replace the pieces that were die cut out. I used a teflon bone folder to rub them in place. Trim off some of the front tent flaps straight with the opening of the tent leaving about 1/3 inch or so to wrap around the toothpick poles; keep the pieces. Cut a notch at the top of the tent openings on both sides where the toothpick poles will go - I just made a little half circle to give them more room. Work all the folds in the tent as in the video. Adhere the toothpicks on each side of the holes you cut such that they will stick up when folded; they will cross at the hole. Do not glue the poles together! They need to move independently so the card can open/close, i.e. they will rub against each other as the card is opened/closed. I wrapped and glued the tent flaps around each toothpick at the tent front. For the back toothpicks, I used the extra paper from the front flaps to secure them then glued the back flaps together at the tab as shown in the video. The tent back will need to fold outwards so leave room behind the tent (in the video Karen folds the flaps inward to allow the tent to be put further back in the card - don't do this). Adhere in card as shown in video, leaving the extra room behind the tent.

Instead of die cutting vellum to attach the tree stump from step 3, cut a strip about 1/2 inch wide and about 2 3/4 inches long. Mountain fold at 1/2 inch, 1 1/2 inches, and 2 inches (it will form a sort of box, angled on one side). Adhere the 1/2 inch piece against the tent side at the middle lined up at the bottom where it meets the card base. Adhere the other end of the strip on the base of the card, meeting the piece you just glued, to form the box. Once the Glossy Accents on the lamp is dry, adhere it to the top of the tree stump then adhere the tree stump to the vellum where shown. Adhere the fire on the card where shown.


9. For the blanket inside the tent, cut a piece of dark purple linen paper from 6x6 Paper Pad Gingham-Linen Rainbow Petite Prints to fit inside tent - measure the tent base: sides and opening, trim paper to be slightly smaller so it will slide in easily. Slide into tent and mark center/fold with a pencil; fold in half at mark. Trim off the fold itself (minimal amount) while the piece is folded so you get two pieces, then the glue pieces in tent on either side of fold - I curled one corner over and glued the flap corner down so it looked more like a blanket. Create a little pillow out of a white paper towel by cutting a rectangle larger than the pillow size then folding all edges inside and applying a piece of mounting/dimensional tape to the center for some fluff. Add glue around the edges of the pillow then stick down inside tent where shown, avoiding the fold.

10. Adhere "sweet" and "summer" where shown. Adhere glitter stars, adding more at top of card and less going further down to mimic front of card's sky. I highly recommend using the Crystal Katana tool - it is pretty awesome: I placed the stars where I wanted them, put some glue on a toothpick in one hand, used the Crystal Katana to slightly pick up a star, dabbed glue under it and placed it back down. The tool releases immediately! It makes it very easy to add glitter, sequins, pearls, and gem embellishments.


Supplies
Follow my blog with Bloglovin so you won't miss any of the artsy fun!